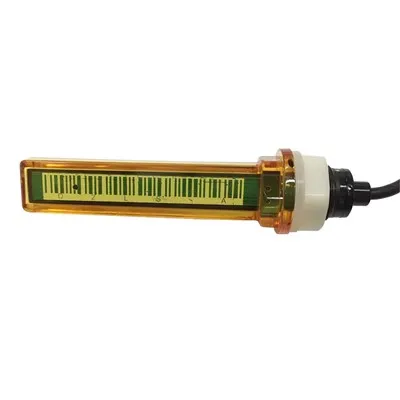
How to Tell If a Liquid Nitrogen Tank Has Failed: Complete 2026 Guide to Cryogenic Tank Failure Detection
In this guide: Everything you need to know about how to tell if a liquid nitrogen tank has failed - covering the early warning signs of liquid nitrogen tank failure, specific failure modes, how to test tank integrity, cryogenic storage tank maintenance best practices, and the complete FAQ guide for 2026.
How to Tell If a Liquid Nitrogen Tank Has Failed: Quick Answer
You can tell if a liquid nitrogen tank has failed by watching for five primary warning signs: (1) excessive frost or ice buildup on the outer shell - especially on the neck tube or tank body - which indicates vacuum insulation failure; (2) a sudden or rapid increase in liquid nitrogen consumption rate, which signals the tank is losing its vacuum insulation and boiling off LN2 faster than normal; (3) the pressure relief valve releasing LN2 gas frequently or continuously, which indicates the tank's internal pressure is exceeding safe levels; (4) the liquid nitrogen level dropping below expected levels despite no additional withdrawal, indicating a tank leak or vacuum failure; and (5) the temperature of stored samples rising above the acceptable range for cryogenic storage (-150°C or below for long-term biological storage). The most reliable early warning system for liquid nitrogen tank failure is a continuous LN2 level monitor with temperature data logging - systems like the CryoPlus IntelliTrap, MVE Variomate, or a data logger connected to a CryoSpot sensor provide 24/7 monitoring and alert you to abnormal consumption patterns before sample loss occurs. Any tank showing two or more simultaneous warning signs should be treated as a critical failure and evacuated immediately.
Why Liquid Nitrogen Tank Failure Is Serious
The Stakes of Cryogenic Storage Failure
Liquid nitrogen tanks are used to store some of the most valuable and irreplaceable materials in existence: embryos, stem cells, blood products, biological samples, vaccines, and cryopreserved tissues. When a liquid nitrogen tank fails, the consequences are not just inconvenient - they can be catastrophic and irreversible.
The -196°C reality: Liquid nitrogen boils at -196°C at atmospheric pressure. At this temperature, biological activity is effectively paused - cells, tissues, and embryos are stored in a state of suspended animation. When the temperature rises above approximately -150°C, ice crystals begin to form inside cells, causing irreversible cryopreservation damage. Once a sample warms past -150°C, recovery is typically not possible.
The invisible threat: LN2 tank failure is often invisible until it is too late. Unlike a water tank that visibly empties, a cryogenic tank with vacuum failure continues to hold LN2 but boils it off at dramatically increased rates. A tank that should last 6 months on a fill might last only 2 weeks. Without monitoring, the first sign of failure is often an empty tank and a room full of destroyed samples.
The regulatory context: Laboratories using LN2 tanks for biological storage must comply with FDA 21 CFR Part 11 (electronic records), CAP accreditation requirements, AABB standards, and their institution's sample storage policies. Most of these standards now require continuous temperature and LN2 level monitoring with automated alerts - making tank failure detection a regulatory compliance issue as well as a scientific one.
The 5 Primary Warning Signs of LN2 Tank Failure
What to Watch For
Warning Sign 1: Excessive Frost or Ice Buildup on the Tank Shell
Frost or ice forming on the outside of a liquid nitrogen tank is one of the most reliable early warning signs of vacuum insulation failure - and it is one of the easiest signs to detect with a simple visual inspection.
How to identify it: Run your hand along the outer shell of the tank. Any area that feels noticeably colder than the surrounding area - or where you can see frost, condensation, or ice - indicates a problem. Normal operating tanks should feel cool to the touch at the neck tube but should not have frost or ice on the tank body. A properly functioning tank has a vacuum insulation layer between the inner and outer shells that prevents heat transfer from the environment to the LN2 inside.
What it means: Frost on the tank shell means the vacuum between the inner and outer shells has been lost. Without vacuum insulation, moisture in the ambient air condenses and freezes on the cold outer shell. The tank is drawing heat from the environment directly into the LN2, causing accelerated boil-off.
Severity scale:
| Frost Pattern | Likely Cause | Severity | Action Required |
|---|---|---|---|
| Light condensation at neck tube only | Normal (cold neck area) | ✅ Normal | None - this is expected |
| Frost on neck tube extending to tank body | Early vacuum degradation | ⚠️ Moderate | Monitor LN2 consumption; plan for service |
| Heavy ice buildup on tank body | Significant vacuum loss | 🔴 High | Check LN2 level immediately; arrange transfer |
| Ice on tank body AND tank feels warm to touch | Complete vacuum failure | 🚨 Critical | Evacuate samples immediately; do not wait |
Note: On smaller dewars and transport containers, some exterior condensation at the neck is normal due to the cold neck tube area. Heavy frost on the body of the tank - especially in a ring pattern around the tank circumference - is the red flag.
Warning Sign 2: Rapid Increase in Liquid Nitrogen Consumption
The single most reliable quantitative indicator of LN2 tank failure is a measurable increase in the daily LN2 consumption rate. A tank with normal vacuum insulation uses a predictable amount of LN2 per day. When the consumption rate increases significantly, the tank is failing.
How to identify it: Track your LN2 consumption rate daily by recording the tank level (using a dipstick or level sensor) and calculating the liters or inches of LN2 lost per day. Compare this to your tank's normal consumption rate.
Normal LN2 consumption rates by tank type:
| Tank Type | Normal Boil-Off Rate | Normal Hold Time (Full Fill) |
|---|---|---|
| Small dewar (10–25 L) | 0.25–0.5 L/day | 20–40 days |
| MVE Voyager / BioCane 20 | 0.5–1.0 L/day | 30–60 days |
| MVE HEco 600 / CryoSystem 600 | 1.5–3.0 L/day | 40–90 days |
| MVE HEco 1500 / CryoSystem 1500 | 3.0–5.0 L/day | 60–100 days |
| MVE Titan 2000 / large storage | 5.0–10.0 L/day | 80–150 days |
| Transport dewar (CX100/CRYO Express) | 0.5–2.0 L/day | 10–30 days (shipment) |
What it means: A tank consuming 50% or more above its normal rate has vacuum insulation degradation. A tank consuming 2–3x its normal rate has significant vacuum loss and is approaching failure.
Example: If your MVE HEco 600 typically uses 2.0 L/day and suddenly starts using 5.0 L/day, the tank has lost approximately 60% of its insulation efficiency. At this rate, the tank will empty in approximately 40 days instead of 90 - and if the trend continues, it will empty even faster. This is your window to transfer samples before total failure.
The consumption tracking method: Record the LN2 level daily using a dipstick, a calibrated level sensor (like the MVE Variomate or CryoPlus IntelliTrap), or by weighing the tank on a scale. Calculate the daily loss rate. Flag any rate more than 25% above your established baseline as an alert condition.
Warning Sign 3: Pressure Relief Valve Activating Frequently
Liquid nitrogen tanks are equipped with pressure relief valves (PRV) that release gas when the internal pressure exceeds the safe operating limit (typically 2–5 PSI above atmospheric pressure). Frequent or continuous PRV activation is a serious warning sign.
How to identify it: Visually inspect the pressure relief valve outlet daily. Any frost, ice, or visible LN2 vapor coming from the PRV outlet between regular fills indicates the valve is activating. Also listen for a hissing sound from the PRV area - this is most audible in quiet laboratory environments.
What it means: A PRV that activates frequently indicates the tank is building internal pressure faster than the venting can handle. This can be caused by:
Rapid ambient temperature change (tank moved from cold storage to warm lab)
LN2 level too high (tank filled above the recommended level, expanding liquid has no gas space)
Blockage in the pressure relief pathway (ice or frost blocking the valve)
Pressure relief valve failure (valve stuck partially closed or failing to reseat)
Vacuum failure (heat infiltration causing rapid LN2 vaporization)
Severity scale:
| PRV Behavior | Likely Cause | Severity | Action Required |
|---|---|---|---|
| PRV releases briefly after a fill | Normal thermal expansion | ✅ Normal | Expected within 2 hours of filling |
| PRV activates weekly | Minor pressure issue | ⚠️ Moderate | Check fill level; ensure PRV is not blocked |
| PRV activates daily | Significant pressure issue | 🔴 High | Do not fill further; investigate immediately |
| PRV is stuck open or leaking | Valve failure | 🚨 Critical | Tag tank out of service; evacuate samples |
Warning Sign 4: Liquid Nitrogen Level Dropping Below Expected Range
A LN2 level that drops faster than the tank's normal consumption rate - with no additional withdrawal - is a direct indicator of tank failure.
How to identify it: Use a LN2 level dipstick (the most common method), an electronic level sensor, or a weighing scale to check the tank level daily. Compare to the expected level based on your consumption records.
What it means: A tank losing LN2 faster than normal has one of two problems:
Vacuum failure - heat is entering through the failed insulation, causing accelerated LN2 boil-off
Tank leak - LN2 is escaping through a crack, failed seal, or damaged valve
How to distinguish vacuum failure from a tank leak:
Vacuum failure: The tank holds LN2 but uses it faster. The LN2 level drops consistently but the tank stays cold. Frost appears on the outer shell.
Tank leak: LN2 escapes visibly or audibly as gas. The tank empties rapidly. Frost may appear at the leak point. There may be a hissing sound.
A tank leak is more immediately dangerous - LN2 can cause severe cryogenic burns, and large volumes of expanding LN2 gas can displace oxygen in enclosed spaces, creating an asphyxiation hazard. If you suspect a tank leak, evacuate the area, increase ventilation, and call your LN2 supplier or a qualified cryogenic technician immediately.
Warning Sign 5: Stored Sample Temperature Rising
The ultimate failure indicator: the temperature of your stored samples rises above the safe cryogenic storage threshold.
How to identify it: Use calibrated temperature loggers placed inside the storage canisters (not just at the top of the tank). The CryoSpot data logger, MVE Chart Recorder, or a calibrated Type T thermocouple logger provides the most accurate sample-level temperature data. Review temperature logs daily.
Safe cryogenic storage temperature thresholds:
| Storage Application | Safe Maximum Temperature | Critical Temperature |
|---|---|---|
| Long-term biological (embryos, stem cells) | -150°C | -150°C |
| Short-term biological (refrigerated biologicals) | -196°C (LN2) | -150°C |
| Vaccine storage | -150°C | -150°C |
| Blood product storage | -196°C (LN2 vapor) | -150°C |
| Cryopreserved reagents | Per manufacturer spec | Per manufacturer spec |
What it means: If your sample temperature data shows a warming trend - even if the tank still contains LN2 - the tank's insulation is failing and heat is penetrating to the sample storage zone. The tank may still contain liquid nitrogen but is losing its ability to maintain the ultra-low temperatures needed for long-term storage.
Why this is the last warning sign: By the time sample temperatures begin rising, you have already lost significant storage time. The earlier warning signs (frost, consumption rate, PRV behavior) are your early detection system. Temperature monitoring is your last line of defense.
Specific LN2 Tank Failure Modes
What Actually Breaks Inside a Liquid Nitrogen Tank
Failure Mode 1: Vacuum Insulation Failure (Most Common)
The vacuum insulation space between the inner and outer shells is the defining feature of modern LN2 storage tanks. Over time, this vacuum can degrade through:
Outgassing: Gas molecules penetrate the vacuum space over years of thermal cycling, slowly degrading the vacuum quality
Micro-leaks: Tiny leaks at the annular seal allow atmospheric gas to enter the vacuum space
Physical shock: A drop or severe impact can damage the annular seals and compromise the vacuum
When vacuum fails: The tank functions as an open dewar - LN2 is exposed to ambient heat and boils off at 5–20x the normal rate. The tank is still technically functional but will empty in days to weeks instead of months. Sample temperature remains stable only while LN2 is present, but the tank requires constant refilling.
How to detect: Monitor LN2 consumption rate. A tank using 5x its normal LN2 rate has significant vacuum failure.
Failure Mode 2: Pressure Relief Valve Failure
The pressure relief valve is a safety-critical component that prevents the tank from over-pressurizing if the internal temperature rises. If the PRV fails:
Stuck-open: Tank loses LN2 continuously through the valve; tank empties faster
Stuck-closed: Tank can over-pressurize dangerously; risk of tank rupture or explosive LN2 release
How to detect: Check the PRV outlet visually for frost or vapor. Listen for hissing. If the PRV appears to be stuck or is activating more than weekly, tag the tank out of service immediately.
Failure Mode 3: Neck Tube Deterioration
The neck tube is the passage through which LN2 vapor escapes and LN2 is filled. It is also the most thermally exposed part of the tank and the first place where frost and ice accumulate during vacuum failure.
When the neck tube fails: The tank's ability to maintain temperature stratification is compromised. Warm vapor from the top of the tank mixes with the cold liquid below, accelerating boil-off. Ice can form inside the neck tube, blocking the vapor space and causing dangerous pressure buildup.
How to detect: Visually inspect the neck tube for ice buildup. Check for frost extending deep into the neck tube area.
Failure Mode 4: Sample Canister Seal Failure
Individual sample canisters inside the main tank can develop ice seals that trap liquid nitrogen inside the canister. When the canister is removed, this trapped LN2 can splash and cause cryogenic burns.
How to detect: Use a LN2-aware sample handling protocol. Never reach into a canister directly. Thaw canisters in a biosafety cabinet using proper cryogenic PPE (cryogenic gloves, face shield, lab coat).
LN2 Tank Failure Detection Equipment
The Best Monitoring Systems for Early Warning
| Product | Type | Monitoring Capability | Alert Method | Price Range |
|---|---|---|---|---|
| CryoPlus IntelliTrap | Level sensor + data logger | LN2 level, temp, consumption rate | Email, SMS, audible alarm | $800–$1,500 |
| MVE Variomate | Continuous level sensor | LN2 level, fill history | Visual display + SMS | $500–$900 |
| MVE Chart Recorder | Temperature logger | Canister temperature | Visual chart + alarm contact | $300–$600 |
| CryoSpot Data Logger | In-tank temperature logger | Sample-level temperature | App + cloud dashboard | $200–$400 |
| CryoTemp Wireless | Wireless temp + level | Multi-tank monitoring | App + SMS | $600–$1,200 |
| Manual dipstick | Visual level check | LN2 level only | None (requires daily manual check) | $10–$30 |
| Tank scale | Weight-based level | LN2 level by weight | None (requires daily manual check) | $50–$200 |
What to Do When a LN2 Tank Fails
Emergency Response Protocol
| Step | Action | Timeframe |
|---|---|---|
| 1. Alert | Notify lab supervisor and all affected sample owners immediately | Immediate |
| 2. Assess | Check LN2 level, consumption rate history, frost pattern, and PRV status | 5 minutes |
| 3. Secure | Put on cryogenic PPE (gloves, face shield, lab coat) before approaching tank | Before any tank contact |
| 4. Transfer | Transfer samples to a functioning backup tank with verified LN2 level | Within 2 hours |
| 5. Tag out | Label the failed tank "DO NOT USE - EQUIPMENT FAILURE" | Immediately after evacuation |
| 6. Document | Record the failure symptoms, timeline, LN2 level at discovery, and actions taken | Within 24 hours |
| 7. Service | Contact the tank manufacturer or a qualified cryogenic technician for inspection and repair | Within 1 week |
| 8. Review | Audit your monitoring protocol - determine what warning signs were missed and update procedures | Within 2 weeks |
Frequently Asked Questions
Q1: How do I know if my liquid nitrogen tank has lost its vacuum?
The most reliable indicators of vacuum loss are: (1) excessive frost or ice on the outer tank shell (not just the neck tube area) - a ring of ice around the tank body is a clear vacuum failure indicator; (2) a measurable increase in daily LN2 consumption rate - a tank using 2–5x its normal LN2 rate has significant vacuum degradation; (3) the tank body feeling warm to the touch in areas other than the neck tube. Use a LN2 level dipstick or electronic sensor to track your daily consumption rate and compare it to your established baseline. Any consumption rate 50% or more above normal baseline is a strong indicator of vacuum failure. For the most reliable early detection, install a continuous LN2 level monitor (CryoPlus IntelliTrap or MVE Variomate) that logs consumption data and sends automated alerts when the rate exceeds your set threshold.
Q2: How often should I check my liquid nitrogen tank to detect failure early?
Check your LN2 level manually with a dipstick at least once per day. In addition, perform a visual inspection of the tank shell for frost or ice at least once per week. The most effective early detection is continuous electronic monitoring: a LN2 level sensor and temperature logger (CryoPlus IntelliTrap or equivalent) that logs data every 15–30 minutes and sends automated SMS or email alerts when the consumption rate exceeds your set threshold. With daily manual checks alone, a tank failure that empties the tank in 7 days means you could lose samples before the next check. With continuous electronic monitoring and automated alerts, you are notified of abnormal consumption within hours of it starting, giving you time to transfer samples to a backup tank. Most regulatory standards (CAP, AABB, FDA 21 CFR Part 11) now require continuous monitoring with automated alerts for biological sample storage.
Q3: What is the normal LN2 boil-off rate for a storage tank?
Normal boil-off rates depend on tank size and insulation quality: a small dewar (10–25 L) uses approximately 0.25–0.5 L/day and holds a fill for 20–40 days; a medium storage tank (MVE HEco 600 class, 600 L nominal) uses approximately 1.5–3.0 L/day and holds a fill for 40–90 days; a large storage tank (MVE HEco 1500 class, 1,500 L nominal) uses approximately 3.0–5.0 L/day and holds a fill for 60–100 days. These rates are for well-maintained tanks with intact vacuum insulation. Any tank using more than 50% above its established normal rate should be flagged for inspection. A tank using 2–5x its normal rate has significant vacuum failure. The best way to establish your tank's normal rate is to record the LN2 level daily for 2–3 weeks after a fresh fill and calculate the average daily loss.
Q4: Can a liquid nitrogen tank explode?
Yes - liquid nitrogen tanks can rupture or burst if the pressure relief valve fails and the internal pressure rises unchecked. Liquid nitrogen expands approximately 175x when it transitions from liquid to gas at room temperature. A sealed tank with a blocked or failed PRV can build enormous pressure rapidly. Additionally, if a tank with intact LN2 is dropped or physically damaged, the sudden thermal shock can cause the inner vessel to crack, leading to rapid LN2 release and pressure buildup. To prevent explosive failure: always keep the pressure relief valve clear of ice and frost; never block or cap the PRV outlet; have the PRV inspected annually; never drop or physically impact a LN2 tank; and never transport a LN2 tank with the sealing cap in place (the sealing cap holds pressure and must be replaced with the vented shipping cap before transport).
Q5: How long can samples survive in a failing liquid nitrogen tank?
The survival time for samples in a failing tank depends on the type and degree of failure: (1) Vacuum failure with active LN2 level: samples remain safe as long as LN2 is present - the tank will simply empty faster, giving you days to weeks of warning depending on the fill level and degree of failure; (2) Tank nearly empty with samples above LN2 level: samples begin warming immediately once above the LN2 surface. At temperatures above -150°C, cryopreservation damage begins within minutes to hours. If the LN2 level has dropped below the sample storage canisters, evacuation to a backup tank is an emergency; (3) Complete tank failure with no LN2 remaining: samples at room temperature are lost within seconds to minutes of LN2 evaporation. The best defense is a backup tank with verified LN2 level that can be prepared in advance and used for emergency sample transfers whenever a primary tank shows failure signs.
The Bottom Line
A liquid nitrogen tank fails in predictable stages - and every stage produces warning signs that can be detected with the right monitoring. The progression is: vacuum degradation → increased LN2 consumption → frost/ice on the tank shell → frequent pressure relief valve activation → rapid LN2 loss → sample temperature rise. Catch the failure at any point in this progression and you have time to transfer samples to a backup tank. Miss the early signs and wait until the tank is empty, and your samples are lost. The single most effective investment in LN2 tank failure prevention is a continuous electronic level and temperature monitoring system - the CryoPlus IntelliTrap, MVE Variomate, or equivalent - with automated SMS and email alerts set to trigger when your tank's consumption rate exceeds 25% above baseline. This system catches vacuum failures within hours, not days, and gives you the window needed to transfer your most irreplaceable biological samples before they are lost. Supplement continuous monitoring with daily manual level checks and weekly visual inspections of the tank shell and pressure relief valve. A working LN2 tank monitoring protocol is not optional in 2026 - it is the minimum standard of care for any laboratory storing irreplaceable biological materials.
Last updated: July 2026
Disclaimer: This guide provides general information about liquid nitrogen tank failure detection for educational purposes. Liquid nitrogen is a cryogenic liquid at -196°C that can cause severe cryogenic burns and can displace oxygen in enclosed spaces, creating an asphyxiation hazard. Always use appropriate cryogenic PPE (face shield, cryogenic gloves, lab coat) when handling liquid nitrogen or working near open LN2 containers. Never attempt to repair, modify, or service a liquid nitrogen storage tank without professional cryogenic equipment certification. Biological sample storage must comply with applicable institutional, local, state, and federal regulations including CAP, AABB, and FDA 21 CFR Part 11 requirements. This guide is not affiliated with, endorsed by, or sponsored by MVE (Chart Industries), Taylor-Wharton, CryoPlus, or any other referenced manufacturer.