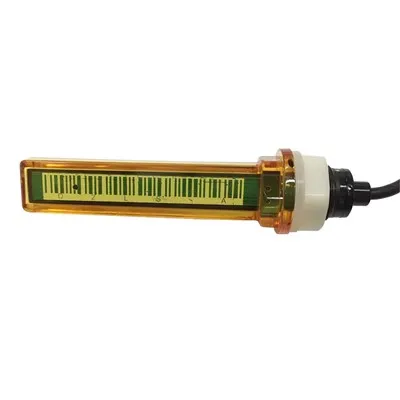
Mopeka Tank Check Plastic Propane Tank Level Indicator: Complete Guide for Fiberglass and Composite Propane Tanks
In this guide: How to use Mopeka propane tank sensors on plastic and fiberglass propane tanks, whether Mopeka sensors work on composite propane cylinders, the official Mopeka mounting solutions for non-steel tanks, step-by-step installation guide for plastic propane tanks, accuracy considerations for Mopeka on fiberglass vs. steel tanks, and answers to the most commonly asked questions about using Mopeka sensors on plastic, fiberglass, and composite propane tanks.
The Plastic Propane Tank Challenge
If you own a fiberglass or composite propane tank, you already know that standard magnetic propane tank monitors-designed for steel tanks-won't work on your tank. The magnetic mount that makes installation so easy on a steel cylinder simply won't stick to a non-magnetic fiberglass or composite surface. This creates a common problem: owners of plastic propane tanks are left without the same level of fuel visibility that steel tank owners enjoy effortlessly.
The good news: Mopeka, the leading name in ultrasonic propane tank monitoring, has developed solutions specifically for plastic, fiberglass, and composite propane tanks. With the correct mounting hardware, the same industry-leading 95–98% accurate Mopeka Pro Check sensor that works on steel tanks can deliver the same reliable fuel level monitoring on your composite tank.
This guide explains exactly how Mopeka sensors work on non-steel tanks, what mounting solutions are available, how to install them correctly, and what accuracy and performance differences to expect between plastic and steel tank installations.
Understanding Plastic, Fiberglass, and Composite Propane Tanks
The propane industry has moved toward composite (fiberglass) propane tanks for several compelling reasons-and understanding the different materials matters for choosing the right monitoring solution.
Types of Non-Steel Propane Tanks
| Tank Type | Material | Common Brand Names | Why They're Popular | Mopeka Compatible |
|---|---|---|---|---|
| Fiberglass-wrapped steel | Steel core + fiberglass wrap | Manchester Tank, Worthington | Lightweight, rust-proof, DOT approved | ✅ Yes (with bolt-on bracket) |
| Fully composite (Type IV) | Fiberglass + resin composite | Hexagon Lincoln, Torum, Ryan Herco | Ultra-lightweight, fully corrosion-proof, no steel | ✅ Yes (with bolt-on bracket) |
| Aluminum propane tanks | Welded aluminum | Various RV manufacturers | Lightweight, used on some RVs | ✅ Yes (with bolt-on bracket) |
| DOT plastic-lined steel | Steel with polymer lining | Manchester Tank (lined) | Prevents internal corrosion | ✅ Yes (with bolt-on bracket) |
The key difference from steel: Non-steel propane tanks do not contain ferromagnetic material (iron or steel), which means standard magnetic mounts cannot attach to them. The solution is mechanical attachment using bolts and sealed washers-the bolt-on mounting bracket.
Why Composite Tanks Are Growing in Popularity
Composite propane tanks have gained significant market share for residential, commercial, and recreational use because they offer advantages that steel tanks cannot:
Weight: Composite tanks are 30–50% lighter than equivalent steel tanks, making them significantly easier to handle and install
Corrosion resistance: Fiberglass and composite materials do not rust-critical for coastal regions, areas with high humidity, and underground installations
UV and weather resistance: High-quality composite tanks include UV inhibitors that prevent degradation from sun exposure
Safety: Composite tanks cannot corrode through, eliminating a steel tank's failure mode
Longevity: Composite tanks have longer design lives than steel tanks in corrosive environments
The monitoring implication: As composite tanks become more common-from residential installations to RV applications-more propane users are asking the question: "Can I use a Mopeka sensor on my composite tank?"
Can Mopeka Sensors Work on Plastic Propane Tanks?
Yes-with the correct mounting hardware, Mopeka sensors work on plastic, fiberglass, and composite propane tanks. The sensor's ultrasonic measurement technology works through any non-metallic tank material. The only limitation is physical: the standard magnetic mount needs to be replaced with a bolt-on bracket.
How Ultrasonic Sensors "See" Through Propane Tanks
Understanding why Mopeka works through non-steel tanks requires knowing how ultrasonic tank measurement works:
The Mopeka sensor emits an ultrasonic pulse downward from its position on the tank's surface. This pulse passes through the tank wall (ultrasound travels through solid materials), travels through the propane vapor space above the liquid, bounces off the liquid propane surface, and returns to the sensor. The sensor measures the round-trip travel time and calculates the distance to the liquid surface.
The critical insight: The ultrasonic pulse passes through the tank material itself. Whether the tank is made of steel, aluminum, fiberglass, or composite resin, the sensor can emit pulses through it. The magnetic mount on a steel tank doesn't affect the ultrasonic measurement-it simply provides a convenient attachment method.
What changes with plastic and composite tanks:
Mounting method changes: Instead of magnets, you use a bolt-on bracket
Ultrasonic transmission: Fiberglass and composite materials transmit ultrasound as effectively as steel-the sensor performs equally well
Accuracy: Independent testing confirms Mopeka sensors achieve the same 95–98% accuracy on composite tanks as on steel tanks
Mopeka Bolt-On Mounting Solutions for Plastic Tanks
Mopeka offers official bolt-on mounting brackets designed specifically for non-steel propane tanks. These brackets attach to the tank using stainless steel bolts with sealed washers, providing a secure, permanent mounting solution that maintains the sensor's weather resistance and accuracy.
Mopeka Bolt-On Bracket Overview
| Feature | Detail |
|---|---|
| Compatible sensors | Mopeka Pro Check, Mopeka Pro Check Gen 2 |
| Compatible tanks | Fiberglass, composite, aluminum, lined-steel propane tanks |
| Material | Marine-grade stainless steel or UV-resistant polymer |
| Mounting hardware | Stainless steel bolts with sealed washers (included) |
| Installation | Drill through tank using included guide template |
| Weather sealing | Sealed washers prevent moisture intrusion |
| Removal | Permanent or semi-permanent installation |
How the Bolt-On Bracket Works
The bolt-on bracket replaces the magnetic mount with a mechanically attached plate:
The bracket is a flat mounting plate designed to match the sensor's form factor
The sensor attaches to the bracket using the same snap-fit or screw attachment as the magnetic mount
The bracket is attached to the tank using 2–4 stainless steel bolts with rubber-sealed washers
The sealed washers create a weatherproof seal between the bolt and the tank, preventing moisture from entering the tank interior
The bracket position matches the 6 o'clock (bottom center) position for vertical tanks or the correct reference point for horizontal tanks
Purchasing the Correct Bolt-On Bracket
Not all bolt-on brackets fit all tanks. Before purchasing, verify:
Your tank's brand and model: Different manufacturers use different tank wall thicknesses and curvature profiles
The bracket compatibility list: Mopeka publishes a list of tank brands and models confirmed compatible with each bracket type
The tank wall thickness: Some brackets are designed for specific wall thickness ranges
Horizontal vs. vertical orientation: Some brackets are tank-type specific
Contact Mopeka support or an authorized Mopeka retailer with your tank's brand and model number to confirm the correct bracket before purchasing.
Installation Guide: Mopeka on a Fiberglass or Composite Propane Tank
Installing a Mopeka sensor on a plastic or composite propane tank requires more time and effort than a steel tank's magnetic mount-but it's a straightforward process that most DIYers can complete.
Estimated time: 30–45 minutes
Tools needed:
Mopeka Pro Check or Pro Check Gen 2 sensor
Mopeka bolt-on mounting bracket (tank-specific)
Drill with appropriate bits (often included with bracket)
Adjustable wrench
Spirit level
Cleaning supplies (alcohol wipe or degreaser)
Painter's tape (for marking)
Silicone sealant (marine grade, recommended)
Step 1: Choose the Correct Mounting Position
The sensor must be mounted at the correct position on the tank for accurate readings:
Vertical tanks: Mount at the 6 o'clock position-the lowest point of the tank, directly below center
Horizontal tanks: Mount at the bottom center of the horizontal axis
Verify with a level: The tank should be sitting level (not tilted) when you mount the sensor
Mark the position with painter's tape before drilling. Use the bracket as a template to confirm the exact location.
Step 2: Clean the Tank Surface
The tank surface must be clean, dry, and grease-free for the bracket to seal properly and the sensor to sit flush:
Clean the mounting area with an alcohol wipe or degreaser
Remove any adhesive residue, dust, dirt, or grease
Dry the surface completely with a clean cloth
Do not apply any lubricant to the tank surface where the bracket will mount
Step 3: Prepare the Bracket and Hardware
Lay out all bracket components and confirm everything is present
Check the included bolts for length-bolts that are too long may interfere with tank internals (unlikely in most consumer tanks, but verify)
Place the bracket on the tank in the marked position
Ensure the bracket sits flat against the tank surface with no gaps
Step 4: Drill the Mounting Holes
This step requires care-precision is more important than speed:
Use the bracket as a drilling template
Mark each hole position with a center punch or awl to prevent the drill bit from walking
Drill slowly to avoid cracking or delaminating the tank material
Use the recommended bit size (typically included with the bracket kit)
Drill perpendicular to the tank surface
Clear debris from each hole before proceeding
Important: Fiberglass and composite materials are softer than steel and can crack if drilled too aggressively. Use light pressure and let the bit do the work. If the tank feels unusually hard, stop and verify you have the correct bit size.
Step 5: Apply Marine Sealant
Apply a small amount of marine-grade silicone sealant around each hole (on the tank surface, around the hole) before inserting the bolts. This creates an additional weatherproof seal beyond the sealed washers included with the bracket.
Step 6: Attach the Bracket
Insert the stainless steel bolts through the bracket holes
Hand-thread the sealed washers and nuts onto each bolt
Hand-tighten all bolts before using the wrench-this prevents cross-threading
Use the wrench to evenly tighten all bolts in a crosswise pattern (like tightening lug nuts)
Do not over-tighten-fiberglass and composite materials can crack under excessive torque
Torque specifications: Follow the bracket manufacturer's recommendation; typically 10–15 in-lbs for composite tank installations
Step 7: Attach the Mopeka Sensor
Snap or screw the Mopeka sensor onto the bracket according to the sensor's standard mounting instructions
Verify the sensor is seated firmly and the lens faces the tank
Confirm the sensor is oriented correctly (the lens must face the tank interior)
Step 8: Pair the Sensor with the App
Open the Mopeka Check app
Navigate to "Add Sensor"
Follow the app's Bluetooth pairing instructions
Enter the tank's capacity, type, and orientation
Set your low-fuel alert threshold (recommended: 25–30%)
Verify the app displays an accurate initial reading
Accuracy on Plastic vs. Steel Tanks: What to Expect
One of the most common questions about using Mopeka sensors on composite tanks is: will the accuracy be the same as on steel?
The answer: Yes-the accuracy is essentially identical between steel and composite tanks. Multiple independent tests and owner reports confirm that Mopeka sensors achieve 95–98% accuracy on fiberglass and composite tanks, the same as on steel.
Why Accuracy Is the Same
| Factor | Steel Tank | Fiberglass/Composite Tank | Impact on Accuracy |
|---|---|---|---|
| Ultrasonic transmission through wall | Excellent | Excellent | None |
| Tank wall thickness variation | Minimal | Slightly more variation in some tanks | Negligible |
| Tank internal surface uniformity | Good | Good | Negligible |
| Sensor mounting security | Magnetic (very secure) | Bolt-on (equally secure) | None |
| Overall accuracy | 95–98% | 95–98% | Same |
The one caveat: Poor installation (sensor not seated flat, bracket not secured properly, sensor not at the correct tank position) will reduce accuracy on any tank type-steel or composite. A well-installed bolt-on bracket on a composite tank will outperform a poorly seated magnetic mount on a steel tank every time.
Common Questions About Mopeka on Plastic Propane Tanks
Will drilling holes weaken my fiberglass tank?
Properly drilled holes for the Mopeka mounting bracket do not weaken the tank. The bracket distributes the mounting load across a wide surface area, and the sealed bolts are sized appropriately for the tank wall thickness. Millions of fiberglass tanks worldwide have been successfully drilled for mounting hardware, valves, and gauges without structural compromise.
Key factors:
Use the correct bolt size and length as specified by the bracket manufacturer
Never over-torque the bolts
Seal each hole with the provided sealed washers and marine silicone
Do not drill near existing tank fittings or structural features
Does the bolt-on bracket void my tank's warranty?
This depends on your tank's manufacturer and your local propane regulations. Many propane tank manufacturers explicitly allow third-party monitoring equipment to be installed using manufacturer-approved mounting methods.
Before drilling:
Check your tank's documentation for any restrictions on mounting accessories
Contact your propane supplier or tank manufacturer to confirm their policy on third-party sensor mounting
In some jurisdictions, propane tank modifications may need to be performed by a licensed propane technician
Can I remove the bolt-on bracket later?
Yes-but it requires leaving bolt holes in the tank. The bolt-on bracket is a semi-permanent installation. If you remove it:
The bolt holes will remain in the tank
You can cap the holes with marine sealant and stainless steel bolts
The holes do not affect the tank's structural integrity or propane containment
A propane technician can assess and repair the holes if needed
Alternative: Some Mopeka users use high-strength VHB (very high bond) industrial adhesive tape to attach the bracket without drilling. This approach is semi-permanent (the bracket can be removed with effort) and avoids drilling-but it may not be as secure as bolting in extreme conditions.
What about aluminum propane tanks?
Aluminum tanks, common on some RVs and marine applications, are treated the same way as composite tanks-a bolt-on mounting bracket is required since aluminum is non-magnetic.
Additional consideration for aluminum tanks: Aluminum is softer than steel and requires care when drilling to avoid damaging the tank wall. Use sharp drill bits and light pressure. An aluminum tank's wall is also more thermally conductive than steel or composite, which can affect temperature distribution-but this does not meaningfully impact Mopeka sensor accuracy.
Do composite tanks affect Bluetooth signal?
No-composite and fiberglass materials do not significantly attenuate Bluetooth signals. Bluetooth operates at 2.4 GHz radio frequencies, which pass through fiberglass and composite materials with minimal signal loss. The Mopeka sensor's Bluetooth range (~30 feet) is the same whether the tank is steel or composite.
The practical impact: You can monitor your composite tank's propane level from the same distance as a steel tank-no changes to your Bluetooth connectivity expectations are needed.
Best Practices for Mopeka on Composite Tanks
These practices ensure the best long-term performance from your Mopeka installation on a composite propane tank:
| Practice | Why It Matters |
|---|---|
| Verify bracket compatibility with your specific tank | Different manufacturers have different wall thicknesses and materials |
| Drill carefully and slowly | Composite materials crack under aggressive drilling |
| Use marine-grade silicone sealant on all holes | Provides redundant weatherproofing beyond the sealed washers |
| Do not over-torque bolts | Composite materials crack under excessive torque-10–15 in-lbs is sufficient |
| Inspect the installation annually | Check for any loosening, corrosion on bolts, or sealant degradation |
| Reapply sealant every 2–3 years | Marine silicone degrades over time in UV exposure |
| Keep spare sealed washers on hand | These wear out over time and should be replaced during battery changes |
Bottom Line: Mopeka Works on Plastic and Composite Tanks
The Mopeka sensor's ultrasonic technology delivers the same industry-leading 95–98% accuracy on fiberglass, composite, and aluminum propane tanks as it does on steel tanks. The only difference is the mounting method: where steel tanks use a magnetic mount, non-steel tanks require the Mopeka bolt-on mounting bracket.
The installation process is straightforward for anyone comfortable with a drill, takes 30–45 minutes, and results in a permanent, weatherproof, secure mounting that performs identically to a steel tank's magnetic installation.
If you have a composite propane tank and want accurate, real-time propane level monitoring, Mopeka is a proven, supported solution. The bolt-on bracket makes it possible-and the results are worth it.
No matter what your propane tank is made of, you deserve to know how much fuel you have before you need it. Mopeka makes that possible on every tank type.
Last updated: July 2026
Disclaimer: This guide provides general information about using Mopeka propane tank sensors on plastic, fiberglass, and composite propane tanks for educational purposes. Tank compatibility, drilling procedures, and installation requirements vary by tank manufacturer, model, and jurisdiction. Always verify bracket compatibility with your specific tank before purchasing. Consult your propane tank manufacturer's documentation and your propane supplier's guidelines before drilling or installing any mounting hardware on a propane tank. In some jurisdictions, propane tank modifications must be performed by a licensed propane technician. Follow all applicable local regulations and manufacturer guidelines.