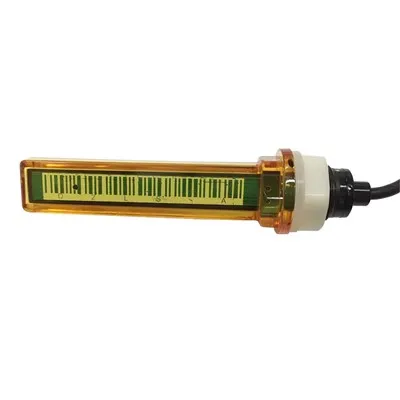
Propane Gas Level Indicator Strip for Mounting Outside Tank: Complete Guide
In this guide: What propane gas level indicator strips are, how they mount on the outside of a propane tank to show fuel level without tools or electronics, the different types available (liquid crystal, digital LED, and analog mechanical strips), step-by-step installation instructions, accuracy comparisons, top products in 2026, and answers to the most commonly asked questions about external propane tank level indicator strips.
What Is a Propane Gas Level Indicator Strip?
A propane gas level indicator strip is a thin, adhesive-backed strip that mounts directly on the outside of a propane tank to display the current fuel level. Unlike ultrasonic sensors or pressure gauges, indicator strips do not require batteries, Bluetooth pairing, smartphone apps, or any electronics. They are passive devices that change appearance (color, pattern, or display) based on the temperature difference between the liquid and vapor zones inside the tank-giving you a visible, at-a-glance reading of how much propane remains.
The appeal is simplicity. Propane gas level indicator strips are one of the most affordable, lowest-maintenance, and easiest-to-install fuel level solutions available. A single strip costs $5 to $30, requires no setup, no calibration, and no ongoing attention. You stick it on the tank, and it works-immediately and continuously, for years.
This guide covers everything about propane gas level indicator strips: how they work, what types exist, how to install them correctly, how accurate they are compared to other methods, the best products available, and whether a level indicator strip is the right choice for your situation.
How Do Propane Gas Level Indicator Strips Work?
Propane gas level indicator strips work by exploiting the temperature difference between the liquid and vapor zones inside a propane tank. This is the same physical principle behind the warm water test-but in reverse and permanently applied to the tank surface.
The Temperature Differential That Makes Strips Work
Inside every propane tank, two distinct thermal zones exist simultaneously:
Zone Temperature Location Physical Cause
Liquid zone Cold: typically 0°F to 50°F Bottom 80–85% of tank Liquid propane absorbs heat from the tank wall to vaporize for appliance use
Vapor zone Warmer: same as tank wall temperature Top 15–20% of tank (ullage) Vapor space is at tank pressure; no active heat consumption
The liquid propane inside the tank is significantly colder than the tank walls and the vapor above it because it is continuously absorbing heat to vaporize and supply your appliances. This is true whether the tank is full or nearly empty-the liquid is always cold relative to the steel walls.
When you attach a temperature-sensitive strip to the outside of the tank:
The portion of the strip overlying liquid propane is in contact with a tank wall that is being cooled by the cold liquid inside
The portion of the strip overlying vapor space is in contact with a tank wall that is warmer (no cold liquid below)
The strip changes appearance at the liquid-vapor boundary-revealing the fill level
Types of Propane Level Indicator Strips by Technology
Not all propane gas level indicator strips use the same technology to display level. Three main types exist:
Type 1: Liquid Crystal (LC) Thermometer Strips
Liquid crystal indicator strips contain thermochromic liquid crystals-chemicals that change color at specific temperatures. These strips display a color gradient along their length. The cold zone (over liquid) shows one color, and the warm zone (over vapor) shows another. The boundary between colors marks the liquid level.
How to read them: Read the temperature scale printed next to the color bar. The temperature reading on the strip tells you the tank wall temperature at each point. The cold-to-warm transition marks the liquid level.
Characteristics:
Color-changing display (typically blue to green or blue to red)
Temperature scale printed alongside for reference
Requires ambient warmth or sunlight to activate the crystals
May be difficult to read in very cold or very hot conditions
Cost: $5–20
Type 2: Digital LED Level Indicator Strips
Digital LED level indicator strips are electronic but minimal-they consist of a series of LED lights (usually green, yellow, and red) mounted in an adhesive strip on the tank, connected to a small probe or sensor.
How they work: A thermistor or temperature probe is attached to the tank at one point. The LED display shows a vertical bar of lights that corresponds to the temperature profile along the tank. Green lights at the bottom indicate cold (liquid); no lights or red lights at the top indicate warm (vapor). The number of lit green bars tells you the fill level.
Characteristics:
Clear digital display (bar graph style)
Requires battery power (small coin cell or AA)
More accurate than purely passive liquid crystal strips
More expensive: $20–50
May require probe installation through a tank port
Type 3: Analog Mechanical Level Strips
Analog mechanical strips are the simplest type-they use a bimetal spring or wax-filled capsule that expands and contracts with temperature, moving a visible indicator or changing the color of a window.
How they work: A small capsule filled with wax or a bimetal coil is attached to the tank. As the tank wall temperature changes (warm over vapor, cool over liquid), the capsule expands or contracts, moving a pointer or revealing a colored window. The position of the pointer indicates fill level.
Characteristics:
No battery required
Very durable and long-lasting
Less precise than liquid crystal or LED types
Cost: $10–25
Why Use a Propane Level Indicator Strip? Key Benefits
Propane gas level indicator strips offer a unique combination of advantages that no other level monitoring method provides:
Benefit Indicator Strip Ultrasonic Sensor Pressure Gauge
Cost $5–50 $65–250 $10–50
No battery needed ✅ Most types ❌ ✅ Mechanical only
No app or phone required ✅ ❌ ✅
Instant installation ✅ 5 minutes 10–15 minutes 2 minutes
Works in all weather ⚠️ Varies by type ✅ ⚠️ Cold weather unreliable
No Bluetooth/wiring ✅ ⚠️ Most require it ✅
Continuous use (years) ✅ Battery-dependent ✅
No calibration needed ✅ ⚠️ Initial setup ✅
Works on steel tanks ✅ ✅ ✅
Works on aluminum tanks ⚠️ Limited options ✅ with bracket ✅
The primary advantage of a level indicator strip is simplicity and reliability. There is nothing to pair, nothing to charge, and nothing to configure. Once mounted, it works passively and continuously for years.
Installing a Propane Level Indicator Strip: Step-by-Step
Installing a propane gas level indicator strip is one of the simplest DIY tasks in propane maintenance. Here is how to do it correctly:
Before You Begin: Check Compatibility
Not all level indicator strips work on all tanks. Verify the following before purchasing:
Check What to Verify
Tank material Most strips work on steel tanks; aluminum compatibility varies by product
Tank surface condition Surface must be clean, dry, and relatively smooth
Strip length Verify the strip is tall enough for your tank height
Strip width Some strips are designed for specific tank diameters
Operating temperature range Check that the strip's range covers your climate
Step 1: Clean the Tank Surface Thoroughly
The adhesive on the strip must bond directly to clean steel for reliable, long-lasting attachment.
Choose the attachment point: the front face of the tank, vertically centered and aligned with the tank's axis
Wipe the surface with an alcohol-based degreaser or isopropyl alcohol
Remove all grease, dirt, dust, loose paint, rust, and moisture
Allow the surface to dry completely (1–2 minutes)
Do not apply any adhesive promoter or primer unless the manufacturer recommends it
Step 2: Mark the Installation Position
The strip must be mounted vertically (straight up and down) for an accurate reading.
Find the bottom center of the tank (the 6 o'clock position)
Use painter's tape or a pencil to mark a perfectly vertical line from the bottom to the top of the tank
For liquid crystal strips: align the center of the strip with this vertical line
For LED strips: mark the sensor/probe attachment point at the tank's service valve area or designated port
Step 3: Apply the Strip
For adhesive-backed strips (liquid crystal and analog mechanical):
Peel the backing from the adhesive side of the strip
Starting from the bottom of the marked vertical line, press the strip firmly against the tank
Work upward, pressing each section firmly as you go
Use a flat tool (credit card, plastic scraper) to smooth out any air bubbles
Press the entire strip firmly for 30–60 seconds to ensure complete adhesive contact
For LED strips with probe attachment:
Install the temperature probe at the designated tank port (consult the manufacturer's instructions for your specific model)
Route the probe wire to the LED display strip location
Mount the LED display strip vertically using the adhesive backing
Connect the probe wire to the display unit per manufacturer instructions
Install batteries if required
Step 4: Activate and Calibrate
For liquid crystal strips: Wait 5–10 minutes for the crystals to equilibrate with the tank temperature. The color boundary should appear within this time. If the strip shows no change, it may need direct sunlight or warmth to activate.
For LED strips: Turn on the power and verify all indicator lights function. Some LED strips require initial calibration (setting the tank capacity in a small DIP switch or button sequence-see manufacturer instructions).
For analog mechanical strips: The indicator should begin responding within 15–30 minutes. If the pointer or color window does not move, gently tap the strip to release any air bubbles in the capsule.
Step 5: Read and Verify
After 30 minutes, check the strip's reading:
Compare the strip's indicated level to a known reference (weigh the tank, or check against a reliable pressure gauge)
The strip boundary should align with approximately where you believe the liquid level to be
If the reading seems significantly off, check the installation: is the strip vertical? Is the adhesive fully bonded? Is the tank surface clean?
If readings remain inconsistent after rechecking installation, the strip may be defective
Reading a Propane Level Indicator Strip
Once installed, reading a propane level indicator strip is straightforward-but there are nuances to getting an accurate interpretation.
How to Read Liquid Crystal Strips
Liquid crystal strips display a color gradient that corresponds to temperature:
Color Zone Temperature What It Means
Dark blue ~55–60°F or below Cool zone - liquid propane below
Light blue/green ~60–70°F Transition zone
Green/yellow ~70–80°F Warm zone - vapor space above
Yellow/red ~80°F+ Hot zone - definitely vapor
The transition between cool (dark) colors and warm (light) colors marks the liquid level. Look for the sharpest color change-this is the liquid-vapor boundary.
Tips for accurate reading:
Read in indirect daylight or under a bright light for best color visibility
Avoid reading in direct intense sunlight, which can heat the entire strip uniformly
In very cold weather (<20°F), color changes may be less distinct
Allow the tank to sit undisturbed for 30 minutes before reading
How to Read LED Level Indicator Strips
LED strips show a vertical bar graph of green, yellow, and red lights:
LED Color Meaning
Green (bottom bars) Cool zone - liquid propane present
Yellow (middle bars) Transition zone
No lights or red (top bars) Warm zone - vapor space
Number of green bars lit Fill percentage (see product scale)
The number of green bars lit is your fill percentage. Most LED strips are labeled with a percentage scale alongside the LED bar (e.g., E for empty on the bottom, F for full on the top, with increments in between).
How to Read Analog Mechanical Strips
Mechanical strips show a pointer or color window at the liquid level:
Display Type How to Read
Pointer indicator A needle or marker points to a scale printed alongside the strip
Color window A window reveals a colored section that aligns with the fill level on a printed scale
Wax capsule The capsule expands or contracts, revealing different colored zones
Read the scale printed on or alongside the strip to convert the indicator position to a fill percentage.
Top Propane Level Indicator Strips in 2026
Product Type Accuracy Power Required Price Best For
LCi propane tank level indicator Liquid crystal 80–88% None $8–15 Steel tanks; most affordable
APeso Propane Tank Level Indicator Liquid crystal 82–88% None $10–18 General consumer use
Camplight Propane Level Indicator Liquid crystal 80–85% None $12–20 Camping and portable cylinders
Brass pressure gauge (inline) Mechanical 70–80% None $15–30 Traditional approach
LED propane level meter (3-bar) Digital LED 85–92% CR2032 coin cell $20–40 Better accuracy; willing to use battery
Mopeka analog level gauge Mechanical dial 75–85% None $15–25 RVers wanting analog simplicity
Bimetal propane level strip Mechanical 78–83% None $10–20 Very cold climates; durable option
Comparing Propane Level Indicator Strips to Other Methods
Propane level indicator strips are one option among several. Here is how they compare directly:
Factor Indicator Strip Ultrasonic Sensor Weighing Pressure Gauge
One-time cost $5–50 $65–250 $0–50 (scale) $10–50
Monthly cost $0 $0 (most) $0 $0
Accuracy 75–92% 90–98% 92–97% 70–85%
Install time 5–10 minutes 10–15 minutes N/A 2 minutes
Works in cold weather ⚠️ Reduced readability ✅ Accurate ✅ Accurate ❌ Unreliable
No-maintenance operation ✅ Yes (most types) ❌ Battery changes ✅ Yes ✅ Yes
Remote monitoring ❌ Visual only ✅ Yes (most types) ❌ Manual ❌ Manual
Digital/phone access ❌ No ✅ Yes ❌ No ❌ No
Long-term durability 3–7 years 5–10 years Indefinite 5–10 years
When to choose a level indicator strip: When you want simple, affordable, zero-maintenance level monitoring without electronics or smartphone access. Best for stationary home tanks, portable cylinders, and situations where a quick visual check is sufficient.
When to choose an ultrasonic sensor instead: When you need remote monitoring, app access, automated alerts, historical data, or the highest accuracy. The additional cost ($65–250) delivers significantly more capability.
Maintaining a Propane Level Indicator Strip
Level indicator strips are low-maintenance devices, but a few simple practices extend their life and accuracy:
Annual Maintenance Checklist
Task Frequency How to Do It
Inspect adhesion Every 6 months Check that strip is fully bonded; re-press any loose edges
Clean the strip Every 6–12 months Wipe with a damp cloth; do not use solvents
Check readability Monthly Verify color or indicator is clearly visible
Verify against reference Every 3 months Compare to weighing or known fill level
Replace if faded When color fades significantly Replace the strip; UV exposure causes fading over time
Check battery (LED type) Every 12 months Replace coin cell or AA batteries proactively
Factors That Affect Strip Lifespan
Factor Effect on Strip Mitigation
UV/sunlight exposure Fades colors, degrades adhesive Apply a clear UV-protective coating or paint over strip
Extreme cold (<-20°F) Liquid crystals may become sluggish Choose strips rated for low temperatures
Extreme heat (>120°F) Adhesive may soften Choose heat-rated strips; provide shade if possible
Moisture/humidity Adhesive may peel over time Use marine-grade sealant around edges
Physical impact Strip may peel or crack Mount on protected tank surface; avoid high-traffic areas
Protecting Your Strip From Weather
Outdoor propane tanks expose level indicator strips to sun, rain, snow, and temperature extremes. To extend strip life:
Apply a clear coat: Spray a thin layer of clear acrylic or marine UV-protectant over the strip after installation. This protects the color display and adhesive from UV degradation.
Seal the edges: Run a thin bead of clear silicone sealant around the perimeter of the strip to prevent moisture from getting under the adhesive.
Provide shade: If possible, mount the strip on the north-facing or shaded side of the tank to reduce UV exposure.
Frequently Asked Questions
Q1: How accurate are propane level indicator strips?
Propane level indicator strips achieve approximately 75–92% accuracy depending on the type and conditions. Liquid crystal strips (80–88%) and LED strips (85–92%) are more accurate than analog mechanical strips (75–83%). Accuracy is highest in moderate ambient temperatures (40–90°F) and lowest in extreme cold (<20°F) or extreme heat (>110°F). They are significantly more accurate than traditional pressure gauges in cold weather and less accurate than ultrasonic sensors in all conditions.
Q2: Do propane level indicator strips work on aluminum tanks?
Most propane level indicator strips are designed for steel tanks. Aluminum has different thermal conductivity than steel, which can affect the temperature differential that makes the strips work. Liquid crystal strips may produce weaker or less distinct color boundaries on aluminum tanks. LED strips with temperature probes can work on aluminum tanks if the probe is properly attached. Before purchasing, verify that the product is rated for your tank's material.
Q3: How long do propane level indicator strips last?
Most propane level indicator strips last 3–7 years, depending on:
UV exposure: Direct sunlight degrades liquid crystal strips and adhesive faster
Temperature extremes: Frequent freeze-thaw cycles can stress the adhesive
Physical protection: Strips on protected tank surfaces last longer than exposed positions
Strip type: LED strips with solid-state electronics typically outlast liquid crystal strips
Protecting the strip with a clear UV coating and edge sealing can extend its useful life to 7–10 years.
Q4: Can I use a propane level indicator strip on a horizontal tank?
Yes-but horizontal tank installation requires a specific approach. The strip should be mounted on the bottom center of the tank's long axis, running lengthwise along the tank rather than vertically. Liquid crystal strips will show a warm-to-cool transition along their length as you move from one end to the other. Some manufacturers offer strips specifically designed for horizontal tanks with horizontal temperature scales. Check product specifications to confirm horizontal tank compatibility.
Q5: Do propane level indicator strips work in winter?
Propane level indicator strips work in winter, but with reduced readability in very cold temperatures. Liquid crystal strips become sluggish below approximately 20°F, and the color boundary becomes less distinct. LED strips continue to function but their accuracy may be affected if the thermistor's calibration is not rated for extreme cold. Mechanical analog strips are the most reliable in very cold conditions. For winter use in cold climates, choose strips rated to at least -20°F and read the strip during the warmest part of the day.
Q6: Can I install a propane level indicator strip on my own, or do I need a professional?
You can install a propane level indicator strip yourself-it requires no professional certification, no tools (for adhesive strips), and no modification to the tank. The installation is a simple DIY task that takes 5–15 minutes. LED strips with probe attachments may require threading the probe into a tank port, which should be done carefully to avoid cross-threading. If you are not comfortable accessing a tank port, have a propane technician install the probe for $20–50.
Q7: Can I use a propane level indicator strip together with an ultrasonic sensor?
Yes-using a level indicator strip and an ultrasonic sensor together is an excellent strategy. The strip gives you an instant at-a-glance visual check every time you walk past the tank. The ultrasonic sensor gives you precise percentage readings, remote monitoring, and automated alerts via your phone. Together, they provide both convenience and accuracy. The two devices do not interfere with each other, and they can be mounted on the same tank without conflict.
Bottom Line: Is a Propane Level Indicator Strip Right for You?
Propane gas level indicator strips deliver the simplest form of gas level monitoring available-no batteries, no app, no pairing, no configuration. Stick it on, and it works, giving you a visible at-a-glance reading of your propane level for years at a time.
Choose a level indicator strip if:
You want the simplest possible solution ($5–50)
You prefer a visual check without opening an app
You need zero-maintenance operation
You are checking a stationary home tank or portable cylinder
You want a backup to an ultrasonic sensor
Choose an ultrasonic sensor instead if:
You need remote monitoring from your phone
You want automated low-fuel alerts
You need the highest accuracy (90–98%)
You manage multiple tanks from one dashboard
You want historical usage data
The best approach for many users: Use a level indicator strip for instant visual monitoring AND an ultrasonic sensor for precision and remote access. The strip tells you at a glance every time you walk past the tank. The sensor tells you exactly where you stand from anywhere in the world. Together, they give you both convenience and confidence.
Whatever you choose, knowing your propane level is one of the simplest and most valuable things you can do for your propane-powered home, RV, or business. A level indicator strip is the most affordable way to start.
Last updated: July 2026
Disclaimer: This guide provides general information about propane gas level indicator strips for mounting on the outside of propane tanks for educational purposes. Product specifications, accuracy figures, and compatibility information are subject to change. Always verify current information from the manufacturer's official documentation before purchasing. Installation of level indicator strips on propane tanks should follow the tank manufacturer's guidelines and applicable safety regulations. Consult a licensed propane professional for any questions about propane tank equipment, installation, or safety.