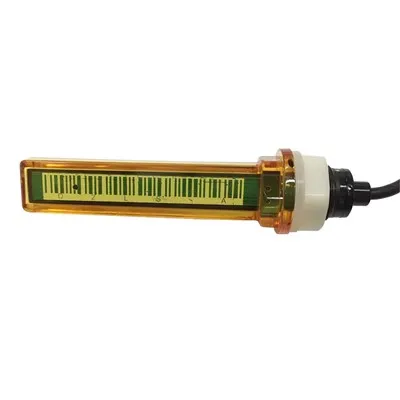
STANDARD SENSOR-BATTERY CHANGE INSTRUCTIONS: The Universal Guide for Propane Tank Monitor Battery Replacement
In this guide: Universal battery replacement instructions that apply to most standard propane tank monitors and ultrasonic sensors, including Mopeka Pro Check, Mopeka Link, Generac 7009 LTE, SmartTank Pro, Otodata, and other popular tank monitoring sensors. Step-by-step procedures, tool requirements, safety precautions, and troubleshooting for every brand and model.
Why a Universal Guide for Propane Sensor Battery Replacement?
If you own a propane tank monitor-whether it's a Mopeka Pro Check, Generac 7009 LTE, Tank Utility, SmartTank Pro, or any other ultrasonic tank sensor-you will eventually need to replace its battery. The battery replacement process is remarkably similar across most propane tank sensor brands, because they all use the same core technology: ultrasonic sonar measurement, Bluetooth or cellular connectivity, and coin cell or cylindrical lithium batteries housed in weatherproof enclosures.
Rather than hunting through different manuals for every brand, this guide covers the universal principles and procedures that apply to most standard propane tank sensors, with specific notes for the most popular models.
Understanding the standard battery replacement workflow means you'll be able to service your propane monitor confidently, whether you're at home, at your seasonal cabin, or on the road in your RV.
Understanding Your Propane Tank Sensor's Battery
Before you begin, know what battery your sensor uses and why. Propane tank sensors use lithium batteries-specifically coin cells (CR2032, CR2450) or cylindrical cells (CR123A)-because lithium batteries offer three critical properties that are non-negotiable for outdoor propane tank sensors:
Wide temperature range: Lithium batteries operate reliably from -30°C to +60°C or beyond, making them suitable for outdoor propane tanks in any climate
Long shelf life: Lithium cells hold their charge for 10 years when sealed, so spare batteries can be stored without degradation
High energy density: These small batteries deliver enough power for months to years of sensor operation
Standard Battery Types by Propane Sensor Model
Sensor Model Battery Type Voltage Capacity Estimated Life
Mopeka Pro Check (original) CR2032 coin cell 3.0V 220 mAh 2–5 years
Mopeka Pro Check Gen 2 CR123A cylindrical 3.0V 1,500 mAh 3–6 years
Mopeka Link CR2032 coin cell 3.0V 220 mAh 2–4 years
Mopeka RC1 CR2450 coin cell 3.0V 620 mAh 2–4 years
Generac 7009 LTE 4× AA lithium (or alkaline) 1.5V each 2,800 mAh 1–3 years
SmartTank Pro WiFi 2× AA lithium 1.5V each 2,800 mAh 1–2 years
Otodata Tank Monitor CR123A or built-in rechargeable 3.0V varies 2–5 years
Tank Utility Built-in rechargeable USB charging N/A Rechargeable
DIY ESPHome (custom) 1× 18650 lithium or USB 3.7V / 5V varies 1–5 years
Tools You Need for Propane Sensor Battery Replacement
The beauty of standard propane sensor battery replacement is that it requires minimal tools. Most sensor manufacturers design their products for consumer-friendly battery access with common household tools.
Universal Tool Kit
Tool Purpose Notes
Small Phillips head screwdriver Battery cap screw removal #0 or #1 size most common
Flat head screwdriver (small) Prying battery cap (if needed) Use gently to avoid damage
Soft cloth or towel Protecting sensor lens during work Prevents scratches on sonar lens
Clean work surface Stable, well-lit workspace Garage, kitchen table, or outdoor bench
New batteries (correct type) Replacement power source Verify model before purchasing
Spare O-rings (optional but recommended) Battery compartment seal replacement Every 2–3 battery changes
Cotton swabs (dry) Cleaning battery compartment No liquid cleaners
Flashlight Illuminating small screws and compartments Phone flashlight works well
** tweezers (optional)** Handling small coin cell batteries Helpful for CR2032 cells
What you do NOT need: Soldering equipment, specialized propane tools, or technical certifications. Standard battery replacement is a consumer-grade maintenance task that anyone can perform.
Safety Precautions Before You Begin
Propane tank sensor battery replacement is a low-risk task-but a few precautions ensure both your safety and the sensor's longevity.
Pre-Replacement Safety Checklist
Propane safety:
Perform battery replacement in a well-ventilated outdoor area
Ensure there are no open flames, sparks, or heat sources within 10 feet of the work area
Confirm the propane tank valve is closed if you're working directly on the tank-mounted sensor
Do not smoke during battery replacement
Electrical safety:
Remove the old battery and wait 30 seconds before inserting the new battery-this resets the sensor's internal circuitry
Never use rechargeable lithium batteries (LIR2032, RCR123A) in sensors rated for primary (non-rechargeable) lithium batteries-voltage differences can damage the sensor
Physical safety:
Work on a stable, flat surface to prevent the sensor from falling
Keep small batteries and screws away from children and pets
Use the correct size screwdriver to avoid stripping the screw head
Universal Propane Sensor Battery Replacement: Step by Step
These steps apply to most standard propane tank sensors. Always check your specific model's manual for model-specific instructions, but the core workflow is consistent across brands.
Phase 1: Preparation
Step 1 - Identify your sensor model and battery type Check the label on your sensor or the documentation that came with it. Confirm the correct battery type before purchasing replacements. Installing the wrong battery type can damage the sensor.
Step 2 - Purchase the correct replacement batteries Buy from reputable brands (Duracell, Energizer, Panasonic, Sony). Avoid cheap no-name batteries-they have shorter life and a higher risk of leaking. For coin cells: check the expiration date. For CR123A cells: confirm they're labeled as lithium, not rechargeable.
Step 3 - Gather your tools and set up your workspace Lay out your tools on a clean, flat surface. Place a soft cloth where you'll set the sensor. Ensure you have good lighting. Open the Mopeka Check app (or your sensor's app) on your phone so you can verify connectivity after the replacement.
Step 4 - Locate the battery compartment On most propane tank sensors, the battery compartment is on the bottom of the device (the end opposite the sonar lens). You'll see a small Phillips head screw in the center of the cap. On the Generac 7009 LTE, the battery compartment is on the side of the unit.
Phase 2: Battery Removal
Step 5 - Remove the sensor from the tank (optional) For most battery replacements, you can leave the sensor mounted on the tank. However, if the sensor is difficult to access or you're working in tight conditions, remove it carefully. Note the orientation before removing so you can remount it correctly.
Step 6 - Unscrew the battery cap Place the sensor on the soft cloth with the lens (the round, dark end) facing down. Using the small Phillips head screwdriver, turn the battery cap screw counterclockwise (lefty loosy) until the cap lifts free. Set the screw aside carefully-it is small and easy to lose.
Step 7 - Remove the old battery Lift out the old battery. Note the orientation-the positive (+) side is typically marked and faces outward toward the cap. In most sensors, the battery sits in a simple friction-fit holder with two metal contacts.
Step 8 - Inspect the battery compartment This step is critical for long-term sensor health:
Check the O-ring: Is it cracked, flattened, or hardened? If yes, replace it with a new O-ring.
Check the contacts: Are both metal contacts clean and flat? Gently straighten any bent contact with a fingernail or the tip of a plastic tool. Do not use metal tools on the contacts.
Check for corrosion: White or green powder indicates battery leakage. Clean it gently with a dry cotton swab. If the contacts are heavily corroded, contact the manufacturer before proceeding.
Check for debris: Blow gently into the compartment or use a dry cotton swab to remove any dust or particles.
Phase 3: Battery Installation
Step 9 - Insert the new battery Take the new battery and confirm the positive (+) side orientation matches the old battery. Place the battery firmly into the holder, pressing until it seats flat with both metal contacts. The battery should not rock or tilt once seated.
Step 10 - Replace the O-ring (if needed) If the O-ring is worn, place the new O-ring in the groove around the battery cap. A tiny dab of silicone lubricant (available at hardware stores) on the O-ring helps it seat properly without binding-but use lubricant sparingly. Do not stretch the O-ring excessively when installing it.
Step 11 - Reassemble the battery cap Place the battery cap back on the sensor. Hand-tighten the Phillips head screw clockwise (righty tighty) until snug. Do not over-tighten-over-tightening strips the plastic threads and creates a chronic problem. The cap should be firmly seated but not compressed.
Phase 4: Verification
Step 12 - Test the sensor connectivity Place the sensor back on the tank (or leave it on your workbench for initial testing). Open the sensor's companion app on your phone. Within 10–30 seconds, the sensor should connect via Bluetooth.
Step 13 - Verify the reading Confirm that:
The battery indicator shows full (or above 50%)
A tank level reading is displayed
The reading is consistent with your expected level
No error messages appear in the app
Step 14 - Troubleshoot if needed If the sensor doesn't connect within 60 seconds:
Toggle your phone's Bluetooth off and back on
Move closer to the sensor (within 10 feet)
Force-quit and reopen the app
Remove the battery, wait 30 seconds, and reinsert it
Model-Specific Battery Replacement Notes
Mopeka Pro Check and Mopeka Link (CR2032)
The Mopeka Pro Check is the most common propane tank sensor, and its battery replacement is the standard procedure described above:
Battery type: CR2032 coin cell
Orientation: Positive (+) side faces the cap
O-ring: Black rubber O-ring around the battery cap-replace every 2–3 battery changes
Common issue: If the sensor reads erratically after replacement, the O-ring may be pushing against the battery and preventing full contact-remove and reseat it
Mopeka Pro Check Gen 2 (CR123A)
The Gen 2 model uses a CR123A cylindrical battery instead of a coin cell:
Battery type: CR123A 3V lithium (not rechargeable)
Orientation: Positive (+) terminal faces the cap end
O-ring: Larger O-ring than the original Pro Check-replace every battery change
Note: CR123A batteries are directional-the flat end is typically negative (-), and the end with the raised bump is positive (+)
Generac 7009 LTE (AA Batteries)
The Generac 7009 LTE uses four AA batteries:
Battery type: 4× AA lithium (or alkaline as fallback)
Location: Battery compartment on the side of the unit, secured with a Phillips head screw
Replacement: Open the compartment, remove all four old batteries, insert four new AAs in the correct orientation (marked inside the compartment), and close the cap
Note: The Generac 7009 LTE uses four AAs rather than a single coin cell because cellular transmission requires more power than Bluetooth
Battery life: 1–3 years depending on cellular signal strength and temperature
SmartTank Pro WiFi (AA Batteries)
The SmartTank Pro WiFi uses two AA batteries:
Battery type: 2× AA lithium or alkaline
Located in a side compartment similar to the Generac
Battery life: 1–2 years (WiFi transmission is power-intensive)
After Battery Replacement: The First 24 Hours
Your sensor's readings immediately after a battery change may require a settling period:
Expected Post-Replacement Behavior
Time After Replacement Expected Behavior What to Do
0–30 minutes Sensor reconnects, reading may drift Normal-sensor is recalibrating
30 minutes–2 hours Reading stabilizes Normal-baseline is establishing
2–4 hours after a propane fill Foam in tank causes erratic readings Wait for propane to settle
24 hours Full accuracy restored Verify reading matches expected level
Beyond 24 hours Inaccurate or no reading Troubleshoot or contact support
After a propane tank fill: Propane foams and churns during filling, creating a turbulent liquid surface that confuses ultrasonic sensors. After any delivery, wait 2–4 hours for the propane to settle before trusting the reading.
Disposing of Old Batteries Responsibly
Never throw lithium batteries in regular trash. They contain reactive materials and can cause fires in waste handling facilities.
Proper Battery Disposal
Battery Type Disposal Method
CR2032 / CR2450 coin cells Recycling center, big-box store drop-off (Target, Best Buy, Home Depot), municipal battery recycling
CR123A cylindrical Same as above
AA lithium / alkaline Alkaline AAs: regular trash (in some jurisdictions). Lithium AAs: recycling only
Damaged or leaking batteries Seal in a plastic bag, contact municipal hazardous waste disposal
Most municipalities have designated battery recycling drop-off points at libraries, fire stations, and municipal buildings. Call your local waste management authority for specific instructions in your area.
Frequently Asked Questions
Q1: How often should I replace the battery in my propane tank sensor?
Most propane tank sensors need battery replacement every 1–5 years depending on the model and conditions:
Sensor Type Replacement Interval
CR2032-powered sensors (Mopeka Pro Check, Mopeka Link) Every 2–3 years
CR123A-powered sensors (Mopeka Gen 2, Otodata) Every 3–5 years
AA-powered sensors (Generac 7009 LTE, SmartTank Pro) Every 1–3 years
USB rechargeable sensors (Tank Utility) Charge as needed; replace built-in battery per manufacturer schedule
Regardless of the stated interval, check the app monthly. If the battery level drops below 20%, replace it immediately rather than waiting for it to fail.
Q2: Will my sensor lose its settings or calibration after battery replacement?
No-in most cases, your sensor retains its settings and calibration after a battery change. The calibration data (tank type, tank capacity, orientation) is stored in the sensor's permanent memory, not in a battery-backed configuration. You should not need to recalibrate after a battery replacement.
Exception: Very old sensors with depleted batteries for extended periods may lose calibration data. If your sensor shows calibration errors after battery replacement, refer to your app's settings to re-enter tank specifications.
Q3: My sensor won't turn on after battery replacement. What do I do?
Work through this checklist in order:
Remove the battery, wait 30 seconds, and reinsert it firmly
Confirm the battery is oriented correctly (positive side toward the cap)
Try a different new battery-it's possible the first one was defective
Check that the O-ring is not pressing against the battery and preventing contact
Inspect the battery contacts for bends or corrosion
If none of the above works, the sensor may be damaged-contact the manufacturer
Q4: Can I replace the battery while the sensor is still mounted on the tank?
Yes-in most cases you can replace the battery without removing the sensor from the tank. The battery compartment is designed for in-situ replacement. The sensor can remain mounted during the entire process.
Exception: If your sensor is in a location that is difficult to access (tight space, awkward angle, extreme height), remove it carefully first. Note its exact orientation before removing so you can remount it in the same position.
Q5: What happens if I use the wrong battery type?
Using the wrong battery type can cause three problems:
Wrong Battery Consequence
Rechargeable lithium (LIR2032, RCR123A) instead of primary lithium Over-voltage damages sensor electronics (rechargeable cells are 3.6–3.7V vs. 3.0V)
Wrong voltage (e.g., CR2025 instead of CR2032) Insufficient contact or no power-sensor won't operate
Wrong physical size Battery won't fit in the holder
Always verify the battery type printed on the battery compartment label or in your sensor's manual before purchasing replacements.
Q6: Should I replace all batteries at once in sensors with multiple batteries?
Yes-always replace all batteries at the same time. Never mix old and new batteries in a multi-battery sensor (like the Generac 7009 LTE, which uses four AAs). Mixing old and new batteries causes the new batteries to work harder to compensate for the depleted old ones, significantly shortening the new batteries' life.
When any battery in a multi-battery sensor needs replacement, replace all of them simultaneously.
Q7: Is there a way to extend battery life so I replace batteries less often?
Yes-several practices extend battery life between replacements:
Use quality brand-name batteries - Duracell and Energizer outperform generic brands in long-term drain tests
Reduce Bluetooth polling frequency in your app if the option exists (check readings every 15–30 minutes instead of continuously)
Shade the sensor from direct summer sun - extreme heat accelerates battery drain
Ensure good cellular/Bluetooth signal - weak signals require more power to maintain connection
Update firmware - manufacturers frequently release battery optimization updates
Keep spare batteries on hand - there's no substitute for being prepared
Bottom Line: Standard Propane Sensor Battery Replacement
Battery replacement for propane tank sensors is one of the simplest maintenance tasks in consumer technology. With a small screwdriver, a few minutes, and the correct battery type, you can restore full monitoring capability to your sensor and continue enjoying accurate, remote propane level tracking.
The universal battery replacement process in 12 words: Identify the battery type. Remove the old battery. Inspect the compartment. Insert the new battery. Verify connectivity.
Key reminders:
Always replace the O-ring when it shows wear-it's your sensor's weather seal
Never use rechargeable batteries in sensors rated for primary lithium
Replace all batteries at once in multi-battery sensors
Wait 24 hours after battery replacement for full accuracy
Dispose of old batteries at designated recycling points
A functioning propane tank sensor with a fresh battery is your first line of defense against unexpected run-outs. Keep it powered, keep it calibrated, and it will keep you informed-anywhere, anytime.
Last updated: July 2026
Disclaimer: This guide provides general battery replacement instructions for standard propane tank monitoring sensors for educational purposes. Always verify battery types, procedures, and specifications from your specific sensor manufacturer's official documentation. Battery specifications, sensor designs, and disposal regulations vary by model and jurisdiction. Consult your sensor's user manual and the manufacturer's website for the most current, model-specific information.