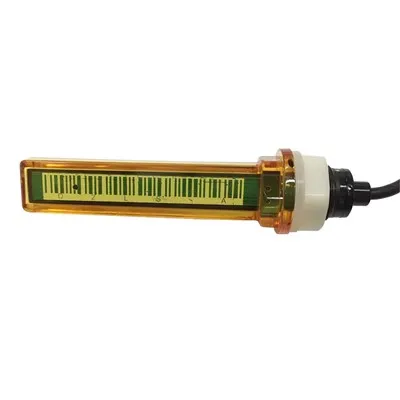
Propane Tank Gauge, Level Indicator & Leak Detector: The Complete 2026 Guide
Everything You Need to Know About Monitoring Your Propane Tank Level and Detecting Leaks-Smart Gauges, Analog Indicators, Mechanical Methods, Electronic Monitors, Leak Detection Tools, Safety Protocols, Installation Guides, and Exactly How to Never Run Out of Propane Again
Introduction: Why Propane Monitoring Matters More Than You Think
Propane powers your RV water heater, stove, furnace, refrigerator, and sometimes your generator. Yet most RVers have no idea how much propane they have until the furnace goes cold at 2 AM in the mountains.
The problem is twofold: You need to know your propane level-and you need to know if your propane system is leaking. Both issues can turn a pleasant camping trip into a dangerous emergency.
This guide covers everything:
Why built-in RV propane gauges are notoriously unreliable
The most accurate propane level monitoring options (2026)
Smart tank monitors with Bluetooth and cellular connectivity
Step-by-step leak detection procedures
Electronic and chemical leak detection methods
Safety protocols every propane user must follow
Installation guides for popular tank monitors
Frequently asked questions
By the end, you'll have a complete propane monitoring and safety system that gives you peace of mind on every trip.
Part 1: The Truth About RV Propane Gauges
Why Your Built-In Gauge Is Lying to You
If you've ever watched your RV's built-in propane gauge sit at "3/4 tank" for weeks and then suddenly drop to empty, you're not alone. The truth is: built-in propane tank gauges are among the least accurate instruments in your RV.
How Built-In Propane Gauges Actually Work ⭐
The internal pressure gauge (most common):
Your RV's propane gauge measures tank pressure, not tank level. Here's why this is a problem:
Propane tanks contain liquid propane at approximately 110-125 PSI at 70°F
As temperature changes, pressure changes dramatically
A "full" tank in summer reads differently than a "full" tank in winter
The gauge doesn't know if you have 5% or 95% propane-only what the pressure is
Temperature vs. Pressure Reality:
| Temperature | Pressure (Full Tank) | Pressure (25% Full) | What Gauge Shows |
|---|---|---|---|
| 100°F (hot) | 165-180 PSI | 140-155 PSI | Both look "full" |
| 70°F (room temp) | 110-125 PSI | 95-105 PSI | Both look "full" |
| 30°F (cold) | 70-85 PSI | 60-70 PSI | Both look "low" |
| 0°F (freezing) | 50-65 PSI | 45-55 PSI | Both look critically low |
The result: Your gauge can show "full" when you're actually at 25%. Or it can show "low" when you're at 75%. It's basically useless for accurate level tracking.
Why RVs Don't Have Better Gauges
Manufacturing cost: Accurate level sensors add $100-300 to the cost of every RV. Most manufacturers skip them.
Regulatory complexity: Propane tank level sensors require certification, adding cost and complexity.
Tank standardization: RVs use removable propane tanks (Type 1, ASME). Fixed sensors aren't practical for exchange tanks.
Market assumption: Many RVers refill at propane refill stations where they get weighed anyway. Built-in gauges are considered "good enough."
The Real Dangers of Gauge Inaccuracy
Danger #1: Running out mid-trip
Furnace dies in cold weather
Refrigerator stops working (food spoils)
Water heater goes cold
If you're boondocking far from help, this is serious
Danger #2: Running out during cooking
Gas leak when tank empties (tank valve left open)
If you don't notice, you waste propane
When you refill, propane spews until you close the valve
Danger #3: Overfilling risk
If you rely on a faulty gauge, you might overfill when refilling
Overfilled tanks can release propane vapor (fire hazard)
Propane delivery services know this risk and may refuse to fill based on bad gauges
Part 2: Accurate Propane Level Indicators
The Best Ways to Know Exactly How Much Propane You Have
Let's look at every accurate propane level monitoring method, from free DIY techniques to high-tech smart systems.
Method 1: The Hot Water Trick ⭐
Cost: FREE | Accuracy: 90-95% | Time: 10-15 minutes
This old-school technique is surprisingly accurate and costs nothing.
What you'll need:
Hot water (about 130-140°F, not boiling)
A bucket or container
Your hand
Step-by-step instructions:
Turn off all propane appliances and close the tank valve
Heat water to approximately 130-140°F (hot tap water mixed with a bit of boiling water works well)
Pour or pour the hot water slowly down the side of the propane tank in a vertical line, from top to bottom
Feel with your hand along the wet strip of the tank:
Where the tank feels hot: The water is touching liquid propane below (the cold liquid absorbs heat)
Where the tank feels cool: This is vapor-only above the propane level
Mark the boundary where hot transitions to cool-that line indicates your propane level
Measure the height of the liquid portion and compare to total tank height
Convert to percentage: Liquid height ÷ total height × 100 = fill percentage
Why it works: Liquid propane is colder than the surrounding vapor and absorbs heat from the water. The transition line is your actual fuel level.
Accuracy tips:
Do this when the tank hasn't been used for several hours (prevents false readings from recent vapor cooling)
Use water around 130-140°F (too hot can give false readings)
Do it in still air (wind can cool the tank unevenly)
Repeat twice for consistency
Best for: Occasional use, budget-conscious RVers, checking gauge accuracy
Method 2: The Scale Method ⭐
Cost: $0-50 | Accuracy: 95-98% | Time: 5 minutes
Weighing the tank is one of the most accurate methods.
How to calculate:
Find tank's tare weight (empty weight). It's stamped on the tank collar (e.g., "TW: 17.0" = 17 pounds empty)
Weigh the full tank using a bathroom scale or luggage scale
Subtract tare weight from total weight
Divide by tank capacity to get percentage
Example calculation:
Tare weight (empty): 17.0 lbs
Weighed total: 38.5 lbs
Propane weight: 38.5 - 17.0 = 21.5 lbs
Tank capacity: 20 lbs propane
Fill level: 21.5 ÷ 20 = 107.5% → OVERFILLED!
Weighing equipment options:
| Equipment | Cost | Accuracy | Best For |
|---|---|---|---|
| Bathroom scale | $0 (own) | ±2 lbs | Occasional checking |
| Luggage scale | $15-30 | ±1 lb | Travel use |
| Digital hanging scale | $25-50 | ±0.5 lb | Frequent checking |
| Propane tank scale | $40-80 | ±0.2 lb | Serious RVers |
Best propane tank scales 2026:
Camco Propane Gauge ($15-25): Hangs from tank handle, reads fill level directly
Propane Cylinder Scale by WoodBridge ($20-35): Digital display, accurate to 0.1 lb
Brabantia Tasty Digital Scale ($30-50): Works for small tanks
Best for: Most accurate DIY method, great for verifying other gauges, refill station accuracy check
Method 3: Analog External Gauges ⭐
Cost: $20-80 | Accuracy: 80-90% | Time: 5 minutes to install
External analog gauges attach to the propane tank's service valve and provide a more reliable reading than built-in gauges.
How analog gauges work:
Measure internal tank pressure (like built-in gauges)
Include temperature compensation to improve accuracy
Display level via a dial or float indicator
Popular analog gauge options:
| Product | Price | Accuracy | Features |
|---|---|---|---|
| Camco Inline Propane Gauge | $15-25 | 80-85% | Simple dial display |
| MOPeka TankCheck (analog) | $30-50 | 85-90% | Digital display, temp compensated |
| Stansport Propane Gauge | $20-35 | 80-85% | Inline pressure gauge |
| GASPRO Propane Tank Gauge | $12-20 | 75-85% | Budget option |
Installation:
Close propane tank valve
Turn off all propane appliances
Attach gauge to tank's service valve outlet
Connect regulator/hose to gauge's outlet
Open tank valve
Read the gauge
Limitations:
Still pressure-based (less accurate than ultrasonic)
Temperature affects readings
Requires manual reading each time
Best for: Budget monitoring, simple installation, moderate accuracy needs
Method 4: Ultrasonic Tank Monitors ⭐
Cost: $50-150 | Accuracy: 92-97% | Time: 10 minutes to install
Ultrasonic sensors measure the actual liquid level using sound waves-no pressure reading involved. This makes them significantly more accurate.
How ultrasonic monitors work:
Mount on the bottom of the propane tank
Emit ultrasonic pulses through the tank wall
Measure time for pulses to reflect off liquid propane
Calculate fill percentage from reflection time
Top ultrasonic tank monitors 2026:
| Product | Price | Accuracy | Power | Special Features |
|---|---|---|---|---|
| Mopeka Pro Check | $65-80 | 95-98% | AA battery (2+ years) | Bluetooth, temperature compensated |
| Mopeka Pro+ | $149-179 | 97-99% | AA battery (2+ years) | Bluetooth + Cellular, GPS |
| Safe-T-Cap | $50-80 | 90-95% | Lithium (5 years) | Simple display, easy install |
| Flame King Tank Monitor | $60-90 | 92-96% | AAA batteries | LED display |
Mopeka Pro Check Deep Dive ⭐
The Mopeka Pro Check is widely considered the best ultrasonic tank monitor for RVs:
Specifications:
Accuracy: 95-98% (matches weighing method)
Display: Bluetooth to smartphone app
Battery life: 2+ years (AA batteries included)
Installation: Straps to bottom of tank, no tools needed
Works with: All steel propane tanks (Type 1, ASME)
App features: Level display, usage tracking, low-level alerts
No monthly fees: One-time purchase
Installation steps:
Clean bottom of propane tank with alcohol wipe
Attach sensor strap to tank bottom
Position ultrasonic sensor against tank wall
Tighten strap securely
Download Mopeka app
Pair via Bluetooth
Calibrate with actual fill level (weigh tank first)
Set low-level alerts (typically 20-25% recommended)
What makes Mopeka Pro Check stand out:
✅ Ultrasonic technology (not pressure-based)
✅ Temperature compensated for accuracy
✅ Smartphone app with historical tracking
✅ No monthly fees
✅ 2+ year battery life
✅ Easy installation
✅ Trusted by thousands of RVers
Best for: Most accurate external monitor, Bluetooth convenience, no monthly fees
Method 5: Smart Cellular Tank Monitors ⭐
Cost: $100-300 + potential monthly fee | Accuracy: 97-99% | Time: 15 minutes to install
For true remote monitoring without Bluetooth range limitations, cellular-connected tank monitors let you check your propane level from anywhere.
Top cellular tank monitors 2026:
| Product | Price | Monthly Fee | Accuracy | Connectivity | Special Features |
|---|---|---|---|---|---|
| Mopeka Pro+ Cellular | $199-249 | $0 (no fee) | 98-99% | 4G LTE | GPS, Bluetooth, no subscription |
| Generac 4G LTE Monitor | $199-249 | $0 | 97-99% | 4G LTE | Works with Mobile Link app |
| Tank Utility | $99-149 | $9.95/mo | 95-97% | Cellular | Established platform |
| Smart Line | $79-129 | $5.95/mo | 93-96% | Cellular | Budget option |
Generac 4G LTE Propane Tank Monitor Deep Dive ⭐
The Generac 4G LTE monitor is one of the most popular cellular tank monitoring solutions:
Specifications:
Connectivity: 4G LTE cellular (no WiFi, no Bluetooth range limit)
Accuracy: 97-99%
Battery life: 5+ years (AA batteries included)
App: Mobile Link (same app as Generac generators)
No monthly fees: One-time purchase
Works with: Standard propane tanks (5-420 gallon)
Installation:
Attach magnetic mount to propane tank (vertical steel tanks)
Position sensor at tank bottom
Activate via Mobile Link app
Create account and add device
Set alert thresholds
Begin monitoring
Key features:
✅ Check level from anywhere (cellular connectivity)
✅ 4G LTE doesn't require WiFi or Bluetooth range
✅ No monthly or annual subscription fees
✅ 5+ year battery life
✅ Integrates with Generac generator monitoring
✅ Low-level and refill alerts via app
✅ Works on tanks from 5 gallons to 420 gallons
Mopeka Pro+ Cellular vs. Generac 4G LTE:
| Feature | Mopeka Pro+ | Generac 4G LTE |
|---|---|---|
| Price | $199-249 | $199-249 |
| Monthly fee | $0 | $0 |
| Accuracy | 98-99% | 97-99% |
| Connectivity | Bluetooth + Cellular | 4G LTE only |
| Works with exchange tanks | Yes | Limited |
| App | Mopeka app | Mobile Link app |
| GPS tracking | Yes | No |
| Battery life | 2+ years | 5+ years |
| Tank size range | All sizes | 5-420 gallons |
Best for: Remote monitoring, no-range limitations, cellular connectivity
Method 6: Integrated RV Management Systems ⭐
Cost: $200-800 | Accuracy: 95-99% | Time: Professional install recommended
For comprehensive RV monitoring, integrated systems track propane along with battery, water, holding tanks, and more.
Top integrated systems 2026:
| System | Price | Propane Accuracy | Monitors | App |
|---|---|---|---|---|
| RV Life iN-Control | $299-499 | 95-97% | Propane, batteries, tanks | Yes |
| Mopeka RV Link | $199-299 | 97-99% | Propane, batteries | Yes |
| Victron Energy | $400-800 | 97-99% | All systems | Yes |
| Go Power! Smart Residential | $300-500 | 95-97% | Propane, electrical | Yes |
Best for: Full-time RVers, those who want complete system monitoring
Part 3: Propane Leak Detection
How to Find Leaks Before They Become Dangerous
Propane leaks are serious business. A leak in an enclosed space can lead to:
Fire or explosion (propane/air mixture ignites)
Carbon monoxide poisoning (incomplete combustion)
Asphyxiation (propane displaces oxygen)
Regular leak detection is essential-not optional.
The 3 Types of Propane Leaks
Type 1: Connection Leaks (Most Common)
Where regulators connect to tanks
Where lines connect to appliances
Where quick-disconnect fittings join
Usually easy to fix
Type 2: Valve Leaks
Tank valves
Appliance valves
Service valve O-rings
May require professional repair
Type 3: Tank Leaks (Most Dangerous)
Corrosion holes
Weld failures
Physical damage
Requires professional inspection and possibly tank replacement
Warning Signs of a Propane Leak
Smell:
Propane has a mercaptan additive (rotten egg smell)
If you smell propane, assume there's a leak
Don't ignore faint smells-they can intensify
Sound:
Hissing or whistling near propane connections
Bubbling in propane tank (visible leak)
Visual:
White "fog" or vapor near connections (propane is cold when released)
Dirt blowing away from a connection (propane spray)
Condensation on tank surface near leak point
Behavior:
Appliances working poorly (low flame, yellow flames)
Unexplained increase in propane usage
Propane smell stronger near ground (propane is heavier than air)
Method 1: The Soap Bubble Test ⭐
Cost: $5-15 | Accuracy: 95% (if done correctly) | Time: 15-30 minutes
The soap bubble test is the gold standard for finding propane leaks.
What you'll need:
Dish soap (Dawn or similar)
Water
Spray bottle or brush
Eye protection
Propane-safe environment
Step-by-step instructions:
Ensure safety first:
No open flames or sparks
No smoking
Good ventilation
No electrical switches (turn lights on/off by pulling cord)
Turn off all propane appliances
Prepare soap solution:
1 part dish soap to 3 parts water
Mix until bubbly
Or use commercial leak detection solution ($8-15 at hardware stores)
Close tank valve if not already closed
Spray or brush solution on all propane connections:
Tank valve
Regulator connections
All hose connections
Quick-disconnect fittings
Appliance connection points
Any visible fittings or joints
Slowly open tank valve (fully open-don't leave partially open)
Watch carefully for bubbles:
Small bubbles: Minor leak
Growing bubbles: Moderate leak
Instant large bubbles or spray: Serious leak-CLOSE VALVE IMMEDIATELY
Mark any leak points with tape or marker
Close tank valve completely after testing
Repair identified leaks or consult professional
Commercial leak detection solutions:
TR Industries Propane/LP Gas Leak Detector ($8-12): Ready-to-use spray
Rectorseal 25650 Natural Gas Detector ($10-15): Works for propane too
Camco Propane Leak Detector ($6-10): Budget option
Accuracy tips:
Don't use too much soap (dilutes the solution)
Ensure good lighting to see small bubbles
Check in still air (wind blows bubbles away)
Check connections at different temperatures (leaks can be temperature-dependent)
Repeat test after any repair
Best for: Most reliable DIY method, all propane systems, regular maintenance
Method 2: Electronic Leak Detectors ⭐
Cost: $30-200 | Accuracy: 98% | Time: 10-30 minutes
Electronic leak detectors sense propane vapor and alert you with sound and/or lights.
How electronic leak detectors work:
Sensor tip detects propane molecules in air
Alarm sounds when propane concentration exceeds threshold
Some models show leak severity on a display
Top electronic leak detectors 2026:
| Product | Price | Sensitivity | Features |
|---|---|---|---|
| UEi CFG200 Combustible Gas Detector | $60-80 | High | Digital display, adjustable sensitivity |
| Brennenstuhl Gas Detector | $30-50 | Medium | Audio/visual alarm, compact |
| FLIR GP2 Propane Detector | $150-200 | Very High | Thermal imaging, smartphone app |
| BOSCH GasAlert MicroClip | $100-150 | High | Industrial grade, long battery life |
How to use electronic leak detector:
Allow detector to warm up (most need 30-60 seconds)
Calibrate in fresh air (away from propane)
Move probe slowly near all propane connections
Pause at each connection for 2-3 seconds
Listen for alarm when propane is detected
Mark leak location when alarm triggers
Confirm with soap test if needed
Best for: Professional-grade detection, hard-to-reach areas, frequent leak checking
Method 3: The Halogen Leak Detector (Professional) ⭐
Cost: $100-300 (rental) or $300-1,000+ (purchase) | Accuracy: 99.9% | Time: 20-45 minutes
Halogen leak detectors use a heated sensor that reacts to halogen gases. While propane isn't a halogen, these detectors can be adapted for professional leak detection.
Not recommended for DIY due to cost and complexity. Professional propane technicians use these.
Method 4: Ultrasonic Leak Detection ⭐
Cost: $50-300 | Accuracy: 95% | Time: 15-30 minutes
Propane escaping under pressure creates ultrasonic sound waves. Ultrasonic detectors pick up these frequencies.
How ultrasonic detectors work:
Listen for high-frequency sounds beyond human hearing
Propane leaks produce characteristic "hissing" in ultrasonic range
Alarm triggers when leak sound is detected
Top ultrasonic leak detectors 2026:
| Product | Price | Range | Features |
|---|---|---|---|
| TIF 5000 Ultra-Trim Leak Detector | $200-300 | 20 feet | Adjustable sensitivity, visual/audible |
| UEi ultrasonic Leak Detector | $80-120 | 10 feet | Budget professional option |
| Amprobe ULD-100 | $100-150 | 15 feet | Good sensitivity, durable |
Best for: Finding hidden leaks, large tanks, underground lines
Method 5: The Pressure Test (Professional) ⭐
Cost: $100-300 (professional service) | Accuracy: 99.9% | Time: 30-60 minutes
A pressure test isolates your propane system and checks for pressure loss over time.
How pressure testing works:
All appliances are disconnected or valves closed
System is pressurized with nitrogen (not oxygen)
Pressure is monitored for 30-60 minutes
Any pressure drop indicates a leak
Individual components are tested to isolate leak location
Who performs pressure tests:
Propane delivery companies
Licensed propane service technicians
RV service centers
Gas appliance professionals
When to pressure test:
After any propane system work
If you suspect a slow leak (sulfury smell but can't find source)
Annual maintenance for peace of mind
Before long trips
Best for: Comprehensive system testing, suspected hidden leaks, annual maintenance
Part 4: Propane Leak Safety Protocols
What to Do If You Find a Leak
Immediate Actions for Any Propane Leak:
Step 1: DON'T PANIC
Most propane leaks are minor and fixable
Quick, calm action prevents danger
Step 2: Stop the source
Close the propane tank valve immediately
Turn off all propane appliances
If safe to do so, turn off propane at the main shutoff
Step 3: Evacuate if necessary
If leak is in enclosed space, evacuate immediately
Get everyone out of the RV
Leave doors/windows open if possible (don't force them)
Move upwind and away from the leak
Step 4: Eliminate ignition sources
No smoking
No matches or lighters
No candles
Don't turn electrical switches on or off
Don't use phones near leak (risk of sparks)
Don't start vehicle or generator
Don't operate any equipment that could spark
Step 5: Get professional help
If leak is serious or you can't stop it, call 911
Contact your propane supplier
Have a licensed propane technician inspect and repair
Step 6: Don't re-enter until cleared
Wait for professional to confirm it's safe
Ventilate thoroughly before lighting any propane appliance
Have system inspected before use
When to Evacuate Immediately ⭐
EVACUATE NOW if:
You hear hissing or smell strong propane
There's visible vapor or fog
Someone is feeling dizzy, nauseous, or having trouble breathing
You can't locate or stop the leak
The leak is near any ignition source
Tank is visibly damaged or hissing
Don't waste time gathering belongings-GET OUT!
When It's Safe to Wait and Repair:
Minor leak, can wait if:
Very faint sulfur smell
Slow drip/leak from a connection
You've closed the tank valve
Good ventilation available
No ignition sources present
You're comfortable making the repair
Common minor repairs you can make:
Tightening loose connections (with soap test confirmation)
Replacing damaged O-rings
Replacing worn washers
Tightening valve packing nuts
Replacing damaged quick-disconnect fittings
When to call professional:
Any tank valve leak
Internal appliance leaks
Tank corrosion or damage
Line leaks behind walls
You can't locate the leak
You're uncomfortable with the repair
After any repair, system needs professional inspection
Part 5: Installation Guides
How to Install Popular Propane Monitoring Systems
Installing the Mopeka Pro Check ⭐
Tools needed: None (included in package)
Time: 10-15 minutes
Installation steps:
Clean tank bottom: Use included alcohol wipe to clean bottom of propane tank where sensor will mount
Position sensor: Mount on bottom center of tank (where propane liquid settles)
Attach mounting bracket: Wrap included straps around tank and through bracket
Secure sensor: Place ultrasonic sensor face against tank wall
Tighten straps: Secure but don't overtighten (finger-tight plus half-turn)
Download app: Search "Mopeka" in App Store or Google Play
Create account: Follow app prompts to create account
Pair device: Enable Bluetooth, pair with sensor
Calibrate: Weigh tank and enter actual weight in app for calibration
Set alerts: Configure low-level warning (recommend 25%)
Test: Check reading matches known tank level
Tips for accuracy:
Clean tank surface before mounting (oil and dirt affect readings)
Mount in center of tank bottom (most consistent liquid level)
Calibrate with known full weight for best accuracy
Re-check calibration every 6 months
Installing the Generac 4G LTE Monitor ⭐
Tools needed: None (magnetic mount)
Time: 15-20 minutes
Installation steps:
Choose mounting location: Bottom center of vertical steel propane tank
Clean surface: Clean tank with alcohol wipe
Attach magnetic mount: Position and press firmly (check that magnet grips securely)
Install sensor: Click sensor into magnetic mount
Download app: Search "Mobile Link" in App Store or Google Play
Create/generate account: Follow prompts to create Mobile Link account
Activate device: Use app to scan QR code on sensor
Select tank type: Enter tank specifications (gallons, tank type)
Calibrate: Enter actual fill level or weigh for calibration
Set alert thresholds: Configure notifications for low level and refill reminders
Verify connectivity: Check that app shows cellular signal
Test alerts: Send yourself a test alert to confirm notifications work
For horizontal tanks or exchange tanks:
Use hose clamp or strap mount (not magnetic)
Position sensor at lowest point of tank
May need different mounting hardware
Installing a Basic Analog Propane Gauge ⭐
Tools needed: Adjustable wrench, Teflon tape (optional)
Time: 10 minutes
Installation steps:
Close propane tank valve: Ensure tank valve is fully closed
Turn off appliances: Close all propane appliance valves
Connect gauge: Thread gauge onto tank service valve outlet (use Teflon tape on threads if needed)
Tighten: Hand-tighten, then snug with wrench (don't overtighten)
Connect regulator: Connect propane hose/regulator to gauge outlet
Test for leaks: Use soap bubble test on all connections
Open tank valve: Slowly open tank valve
Read gauge: Check reading (compare to known level if possible)
Note any issues: If gauge doesn't register or shows erratic readings, check connection
Troubleshooting analog gauges:
No reading: Check valve is open, connections are tight
Fluctuating reading: Normal during temperature changes; wait for stabilization
Shows empty when tank is full: Temperature too cold (pressure is low)
Shows full when tank is low: Temperature too hot (pressure is high)
Part 6: The Complete Propane Safety Checklist
Every RVer Must Follow These Rules
Daily Propane Safety Checks ⭐
Before each trip:
Inspect propane tank for visible damage, rust, or dents
Check all connections for tightness
Test propane level (use accurate method, not built-in gauge)
Verify propane smell is normal (mercaptan additive should be present)
Confirm all appliance valves are closed except those in use
Check that CO and propane detectors are functioning
During travel:
Propane tank valve should be CLOSED when towing
If propane is on while driving (for refrigerator), verify connections
If you smell propane while driving, pull over and close valve immediately
At campsite:
Inspect propane connections after any travel bumps
Do soap bubble test on all visible connections
Verify propane level before settling in
Keep propane tank protected from vehicle traffic
Don't store flammable items near propane equipment
Weekly Propane Checks ⭐
Weekly during extended stays:
Recheck propane level (propane usage varies with temperature and appliance use)
Listen for hissing sounds near propane equipment
Smell test around all propane connections
Verify propane storage is secure and protected
Check that CO/propane detectors haven't needed battery replacement
Inspect propane-related rubber parts for cracks or wear
Annual Propane System Maintenance ⭐
Once per year (or before each camping season):
Professional leak test (pressure test by qualified technician)
Inspect propane tank for corrosion, damage, or wear
Check tank recertification date (propane tanks expire)
Inspect all rubber propane hoses (replace if over 5 years old)
Check and replace propane-related O-rings and washers
Inspect and test all propane appliance connections
Verify proper appliance operation (correct flame color, ignition)
Check CO detector function and replace batteries
Update propane level monitoring equipment (replace batteries, recalibrate)
Review propane safety procedures with all family members
Propane Tank Expiration and Recertification ⭐
Propane tank lifespan:
Steel propane tanks (for BBQ, RV): 10-12 years from manufacture date
ASME propane tanks (permanent RV tanks): 12-15 years from manufacture date
Tanks must be recertified every 5-12 years depending on type and condition
Where to find tank expiration date:
Stamped on tank collar near valve ("MFD: 06-21" = manufactured June 2021)
On label attached to tank
On ASME plate for permanent tanks
What happens when tank expires:
Propane suppliers will not refill expired tanks
Tank must be recertified or replaced
Recertification costs $25-75 (if tank passes inspection)
Replacement cost: $150-400 for standard RV tanks
Tip: Mark your calendar with tank expiration dates so you're never caught off guard.
Part 7: Frequently Asked Questions
Q1: Why is my propane gauge giving wrong readings?
A: Your gauge measures pressure, not volume. Propane tank pressure varies with temperature, not just fill level.
Common pressure-based gauge errors:
Hot weather: High pressure makes gauge show MORE than you have
Cold weather: Low pressure makes gauge show LESS than you have
High altitude: Lower atmospheric pressure affects readings
Recently used: Residual pressure from recent appliance use affects reading
Solutions:
Use multiple methods (gauge + hot water test + scale)
Wait 30+ minutes after heavy use before reading gauge
Calibrate your understanding of your specific gauge's behavior
Consider upgrading to ultrasonic or cellular monitor
Q2: How often should I check my propane level?
A: Check before each trip, weekly during extended stays, and when switching tanks.
Recommended checking frequency:
| Situation | Frequency | Method |
|---|---|---|
| Before each trip | Every time | Accurate method (scale, hot water, or smart monitor) |
| Weekend camping | 1-2x per week | Quick check |
| Extended stay (1+ month) | Weekly | Accurate method |
| Full-time boondocking | Every 2-3 days | Smart monitor or accurate method |
| Seasonal storage | Monthly | Quick check |
The rule: If you'd be uncomfortable running out, check your propane. For most RVers, this means checking every 3-5 days during regular use.
Q3: What's the best propane tank monitor for RVs?
A: The Mopeka Pro Check is the best overall for most RVers. Here's the comparison:
| Monitor | Price | Accuracy | Connectivity | Best For |
|---|---|---|---|---|
| Mopeka Pro Check | $65-80 | 95-98% | Bluetooth | Most RVers, best value |
| Mopeka Pro+ Cellular | $199-249 | 98-99% | Bluetooth + 4G LTE | Remote monitoring |
| Generac 4G LTE | $199-249 | 97-99% | 4G LTE | Generac generator users |
| Safe-T-Cap | $50-80 | 90-95% | None (LED display) | Budget, no phone needed |
My recommendation:
Best value: Mopeka Pro Check ($65-80, no monthly fees)
Best features: Mopeka Pro+ Cellular ($199-249, no monthly fees, GPS)
Best for generator users: Generac 4G LTE ($199-249, integrates with Mobile Link)
Best budget: Safe-T-Cap ($50-80, simple, no phone required)
Q4: Can I use a BBQ propane tank gauge on my RV?
A: Partially, but with limitations. Here's what works and what doesn't:
What works:
Universal propane gauges that connect to standard Type 1 fittings
Analog inline gauges (pressure-based)
Ultrasonic monitors that strap to tank bottom (if tank size compatible)
What doesn't work:
Fixed-mount BBQ gauges (designed for horizontal tanks, not RV vertical tanks)
Magnetic gauges for exchange tanks (often too small)
Gauges requiring different connection types
RV propane tank sizes:
20 lb tanks (most common): Same as large BBQ tanks
ASME tanks (permanent): Require different mounting methods
Universal gauges that work on RVs:
Camco Inline Propane Gauge (fits Type 1 connections)
Mopeka Pro Check (straps to any steel tank)
Generac 4G LTE (magnetic mount for steel tanks)
Q5: How do I find a propane leak I can't see?
A: Systematic approach using multiple methods:
Step 1: Soap bubble test (all visible connections)
Spray soap solution on every visible connection
Look for bubbles
Mark and repair found leaks first
Step 2: Electronic leak detector
Slowly move probe near all connections
Pause 2-3 seconds at each joint
Listen for alarm
Mark any detected leaks
Step 3: Ultrasonic leak detector
Listen in areas where you smell propane but can't find source
Propane escaping creates characteristic sound
Step 4: Pressure test (if no visible leak found)
Have professional pressure test entire system
Isolates and identifies hidden leaks
Common hidden leak locations:
Behind appliances (stove, water heater, furnace)
Under floors
Inside wall cavities
At tank valve stems
In old copper lines (pinhole leaks from corrosion)
At buried tank connections
When to call professional:
If you smell propane but can't find source
If leak is behind walls or under floor
If pressure test shows system is losing pressure
If you suspect tank itself is leaking
Q6: How long does a 20 lb propane tank last?
A: It depends on what you're running. Here's the breakdown:
Appliance propane consumption:
| Appliance | Propane Use Per Hour | Typical Usage Hours | Total Per Use |
|---|---|---|---|
| RV Furnace | 0.5-0.75 lbs/hour | 4-8 hours/day | 2-6 lbs/day |
| Water Heater | 0.5-0.75 lbs/hour | 0.5-2 hours/day | 0.25-1.5 lbs/day |
| RV Refrigerator | 0.5-1 lb/day (constant) | 24 hours | 0.5-1 lb/day |
| Stove/Range | 0.5-1 lb/hour | 0.5-2 hours/day | 0.25-2 lbs/day |
| Propane Grill | 1-1.5 lbs/hour | 1-2 hours | 1-3 lbs/use |
| Fireplace | 1-2 lbs/hour | 2-4 hours | 2-8 lbs/day |
Estimated tank life (20 lb tank):
| Usage Pattern | Estimated Duration |
|---|---|
| Weekend camping (furnace + fridge) | 2-4 weeks |
| Week-long camping (furnace + fridge + stove) | 5-10 days |
| Heavy use (furnace + water heater + stove + fridge) | 3-7 days |
| Light use (no furnace, fridge on electric) | 3-6 weeks |
| Refrigerator only (propane mode) | 2-3 weeks |
Factors affecting usage:
Temperature: Colder weather = furnace runs more
Water temperature: How hot you like showers
Cooking frequency: More cooking = more propane
Water heater use: Longer showers = more propane
Insulation quality: Better insulation = less furnace run time
The rule: Calculate your worst-case daily usage, then ensure you have 1.5x that amount to be safe.
Q7: Should I keep propane on while driving?
A: Yes, for refrigerators that run on propane-but with precautions.
When to keep propane on while driving:
Your refrigerator runs on propane (most RV fridges can)
You'll be driving more than 4 hours
No electric hookup available at destination
You want to keep food cold during travel
Safety considerations while driving with propane on:
✅ Tank valve MUST be fully OPEN
✅ All propane appliances should be OFF (except refrigerator)
✅ Verify all connections are tight (soap test before long trips)
✅ Ensure good ventilation (no leaks in driving position)
✅ CO/propane detectors should be functioning
When to turn propane OFF while driving:
Driving through areas with open flame restrictions (check local laws)
Long tunnel or ferry crossing (check regulations)
If you smell propane at all
If you're uncomfortable having propane on
Most states allow propane while driving. Check specific regulations for your route.
Best practice: If driving more than 4 hours, keep fridge on propane. Shorter trips, pre-chill fridge on electric before leaving.
Q8: What are the signs of a propane leak in an RV?
A: Know these warning signs:
Smell signs:
Rotten egg/sulfur smell (mercaptan additive)
Faint smell near propane equipment
Stronger smell near floor (propane is heavier than air)
Smell that comes and goes (intermittent leak)
Sound signs:
Hissing near propane connections
Bubbling sounds from tank
Whistling near valves
Dripping or flowing sounds
Visual signs:
White fog or vapor near connections
Dirt being blown away from a fitting
Condensation pattern on tank (not from weather)
Corrosion or rust near propane equipment
Appliance behavior signs:
Yellow or orange flames (should be blue)
Yellow/sooting on burners
Appliances not heating properly
Furnace or water heater cycling on and off
Popping sounds from furnace
Physical symptoms (if exposed to propane leak):
Headache
Dizziness
Nausea
Difficulty breathing
Feeling drowsy or confused
If you experience physical symptoms:
Get fresh air immediately
Evacuate the RV
Call 911
Don't re-enter until cleared
Q9: Can propane tanks freeze?
A: Yes, but it's different from water freezing.
Propane tank "freezing" is actually:
Frost on tank: External moisture freezing on cold tank (normal, harmless)
"Freeze burn": Very cold propane causing frostbite-like damage to skin (harmful)
Propane flow stopping: Extremely cold temperatures can cause propane to not vaporize properly (harmless, temporary)
When propane tanks freeze:
Occurs in very cold weather (below 0°F / -18°C)
More common with high-use appliances (furnace running constantly)
Happens when propane is being consumed faster than it can vaporize
Affects liquid propane at bottom of tank (withdrawal issues)
Signs of propane flow problems from cold:
Furnace starts and stops repeatedly
Weak flame or no flame
Yellow flames (not enough vaporized propane)
Tank feels very cold to touch
Solutions:
Switch to electric heat or supplemental heating
Cover tank with insulating blanket (approved for propane use)
Move to a warmer location if possible
Wait for tank to warm (propane will flow again)
What NOT to do:
Don't heat tank with open flame
Don't use electric heater directly on tank
Don't try to force propane out by shaking tank
Prevention:
Keep tank above 40% full in cold weather (more propane = less temperature fluctuation)
Use tank blanket approved for propane
Monitor tank level closely in cold weather
Q10: How do I properly close my propane tank for storage?
A: Proper propane tank closure for storage:
Step-by-step storage procedure:
Close tank valve: Turn fully clockwise until it stops
Turn off all appliances: Close all propane appliance valves
Run appliances briefly: Turn on one appliance to burn off remaining propane in lines (optional but recommended)
Close appliance valves: When flame goes out, close that valve
Disconnect external connections: If using external propane, disconnect and cap lines
Check for leaks: Do a soap bubble test before storing
Protect tank: Cover tank opening to prevent debris/pest entry
Secure tank: If storing inside, ensure tank is upright and secure
If storing outside, use approved tank cover
Keep away from heat sources
Ensure good ventilation
Document tank level: Note remaining propane percentage for next season
Mark calendar: Note propane level and when tank should be inspected
Storage location requirements:
Outside: Protected from weather, upright position, good ventilation, away from heat sources
Inside (RV): Tank compartment must be sealed from living space, vented to outside
Never indoors (in house, garage, basement): Propane is a fire hazard if not properly ventilated
Long-term storage tips:
Keep tank above 30% full (prevents moisture inside tank)
Check tank annually for leaks
Verify tank expiration date before next use
Consider professional inspection if tank hasn't been used in over a year
Conclusion: Your Complete Propane Monitoring System
Here's your propane safety and monitoring action plan:
The Multi-Layer Approach ⭐
Layer 1: Know your baseline
Weigh your tank to establish accurate fill level
Note the tare weight (stamped on collar)
Calculate actual percentage: (Total weight - Tare weight) ÷ Propane capacity × 100
Layer 2: Install accurate monitoring
Mopeka Pro Check ($65-80): Best Bluetooth accuracy, no monthly fees
Or Generac 4G LTE ($199-249): Best for remote monitoring
Set low-level alerts at 25%
Layer 3: Regular leak testing
Soap bubble test: Before each trip
Electronic detector: Monthly
Professional pressure test: Annually
Layer 4: Know the warning signs
Rotten egg smell (propane additive)
Hissing sounds
Yellow flames (should be blue)
Physical symptoms (evacuate immediately)
Layer 5: Emergency preparedness
Propane detector and CO detector (functioning, fresh batteries)
Propane appliance shutoff location known
Main tank valve location known
Emergency contact numbers saved
Recommended Products Summary ⭐
| Need | Best Product | Price |
|---|---|---|
| Most accurate level monitoring | Mopeka Pro Check | $65-80 |
| Best remote monitoring | Mopeka Pro+ Cellular | $199-249 |
| Best for Generac users | Generac 4G LTE | $199-249 |
| Best budget level check | Camco Inline Propane Gauge | $15-25 |
| Best leak detection | Soap bubble test (DIY) or TR Industries solution | $5-15 |
| Best electronic detector | UEi CFG200 | $60-80 |
| Best all-in-one | Professional annual inspection | $100-200 |
The Bottom Line:
Your RV's built-in propane gauge is essentially a guessometer. For true peace of mind, you need:
An accurate level monitor (Mopeka Pro Check is the best value)
Regular leak detection (soap bubble test takes 15 minutes and could save your life)
Functioning CO/propane detectors (test monthly, replace every 5-7 years)
Professional inspection (annually, especially if you smell propane)
The cost: $65-200 for monitoring equipment, $5-15 for leak detection supplies, $100-200 annually for professional inspection. Total: $170-415 per year.
The value: Never running out of propane unexpectedly, never having a dangerous leak, complete peace of mind on every trip.
Last Updated: July 2026
Complete Guide: Propane Tank Gauge, Level Indicator & Leak Detector
Disclaimer: This guide provides general information for educational purposes. Always follow manufacturer guidelines and propane safety regulations. For any propane system repair, inspection, or if you suspect a gas leak, consult a licensed propane professional. Propane is flammable and potentially dangerous if mishandled